Keywords: Orbit, Starlink Service Line, Service Line Assignment, Starlink Terminal Assignment
Overview
This guide explains how to add a new Starlink Service Line through the CommBox Edge Cloud Portal (Orbit) interface and how to assign that service line to an organization or sub-organization. It covers selecting the Starlink side-nav menu, creating a service line with details such as alias, account number, subscription type, address and email for quota notifications, and then assigning the service line to the appropriate organizational unit for access control and reporting.
Starlink Service Lines are a billable entity that can hold one or more Starlink Terminals or Kits. A Service Line is associated with a Starlink account and, for Orbit users, is directly linked to the Organization that is associated with the Service Account. A service line can be further associated with a sub-organization of the Service Account linked Organization, for more comprehensive access control and usage attribution.
Adding a Service Line
A Service Line can be added directly from Starlink.com, using the Starlink Mobile App, or in the Orbit interface. This procedure outlines how to add a service line directly in Orbit. Any Service Line added to a Starlink account here will also be reflected at Starlink.com.
-
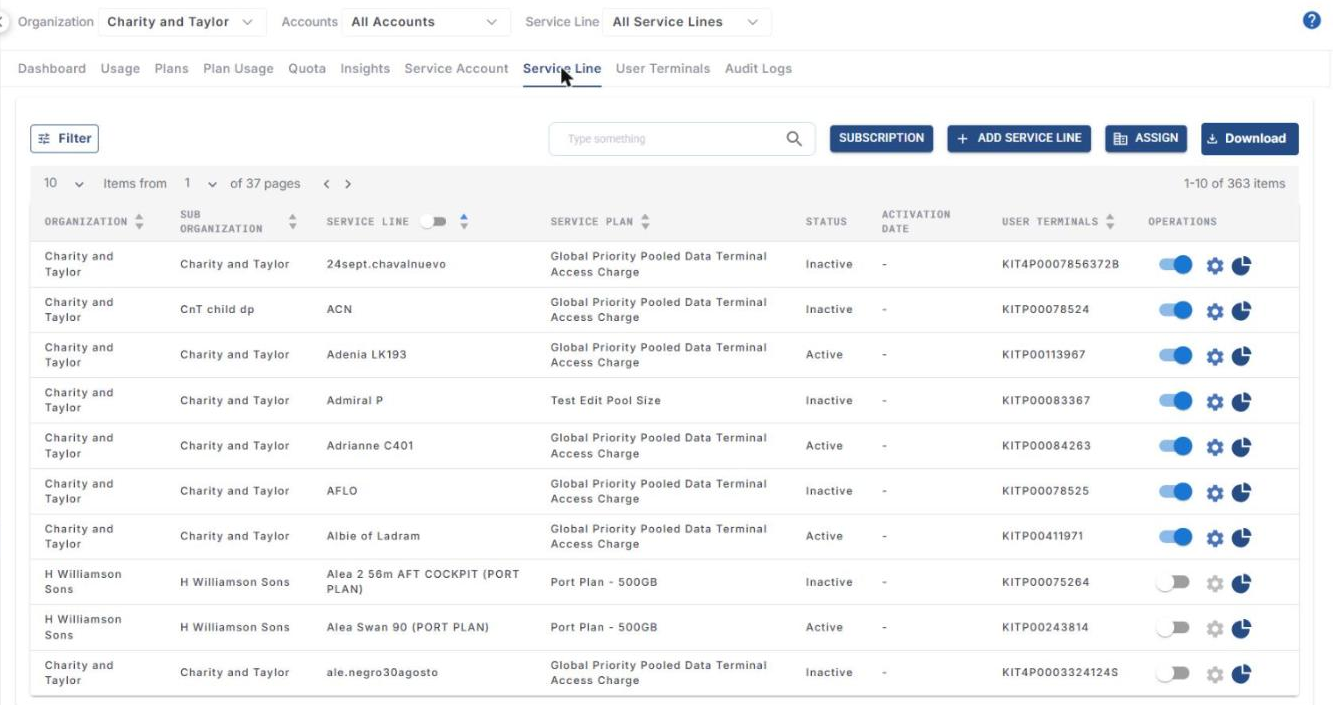
Select Starlink from the side-nav menu and choose the Service Line tab. The Starlink Service Lines associated with the Organization selected in the Organization dropdown at the top are shown.
-
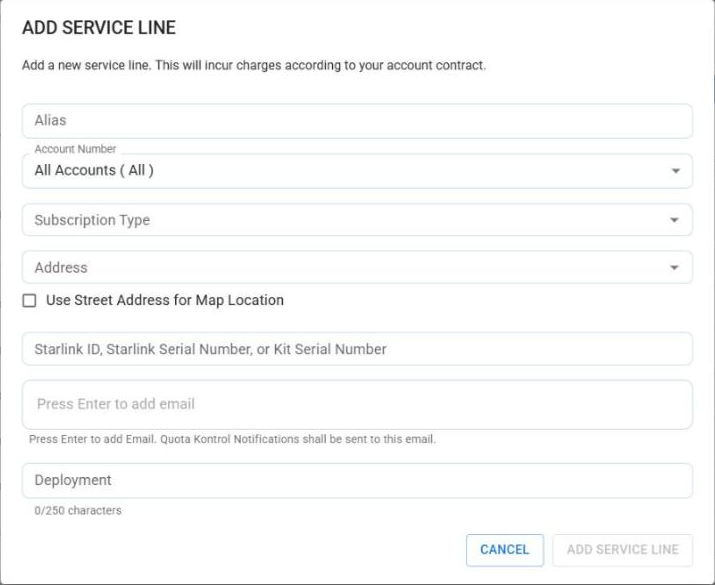
Click the + Add Service Line button. The Add Service Line dialog box opens. Note that adding a new service line will incur charges according to your account contract.
-
Enter an Alias for the Service Line. The alias is displayed throughout the portal in analytics screens and dashboards.
-
Select the Starlink Account Number to associate.
-
Select the Subscription Type.
-
Select the physical location in the Address field. Select the Use Street Address for Map Location checkbox to use this address as the location of the service line on the map.
-
Enter either the Starlink ID, Starlink Serial Number, or Kit Serial Number.
-
Enter a primary email address and press Enter. This email address will be used for Quota Kontrol and other notifications - it can be updated at a later date.
-
Optionally, enter a Deployment description (up to 250 characters).
-
Click the Add Service Line button to complete. Click Cancel to close without adding.
A confirmation dialog will appear, and the necessary API steps will be initiated to add this service line. This process may take some time. Upon completion, the new Service Line will appear in the table.
Assign a Service Line to a new Organization
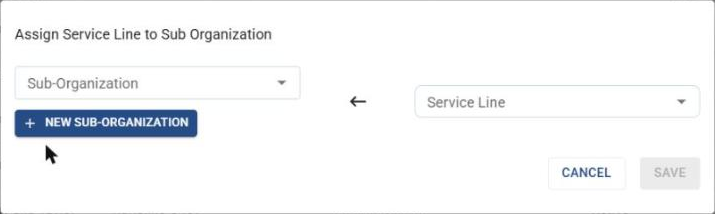
Service Lines can be re-assigned to a Sub-Organization by clicking the Assign button. The Assign Service Line to Sub Organization dialog box allows the user to assign one or more Service Lines to an existing sub-organization, or create a new sub-organization for assignment using the + New Sub-Organization button (select the Parent Organization, enter the Sub-Organization Name and click Create). Click Save to complete the assignment.
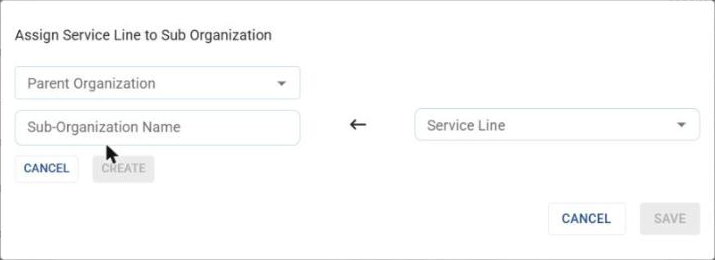
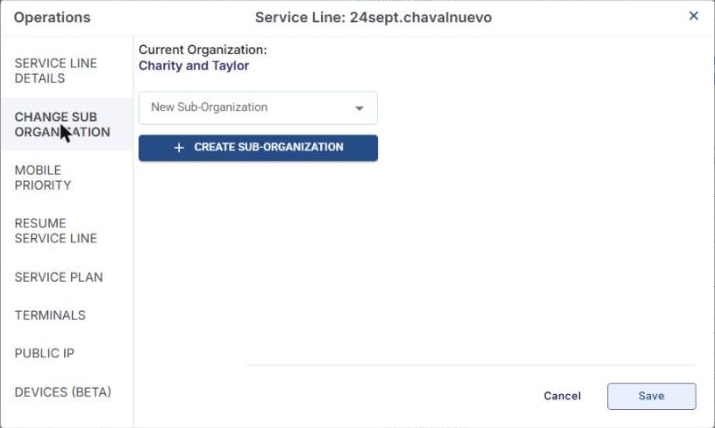
Alternatively, click the Settings (gear) icon of a Service Line in the Service Line table to bring up the Operations dialog box. Here, select Change Sub Organization to re-assign a single service line to an existing or new sub-organization (+ Create Sub-Organization) and click Save.