Keywords: Pooled Account, Standard Account, Edit Pool Account, Quota Kontrol, Starlink Cloud, Orbit
Overview
This guide explains how to set up a pooled account for Starlink Cloud services using the CommBox Edge Cloud Portal platform. A pooled account holds the main Starlink data pool, which can then be divided into multiple pools and plans, each with individual quota limits and actions. The guide covers the Service Account tab of the Starlink screen and the Edit Account Info dialog box where the account type, pool size, time period, Quota Kontrol actions and notifications are configured.
Service Accounts
-
Login to the CommBox Edge Cloud Portal using valid credentials.
-
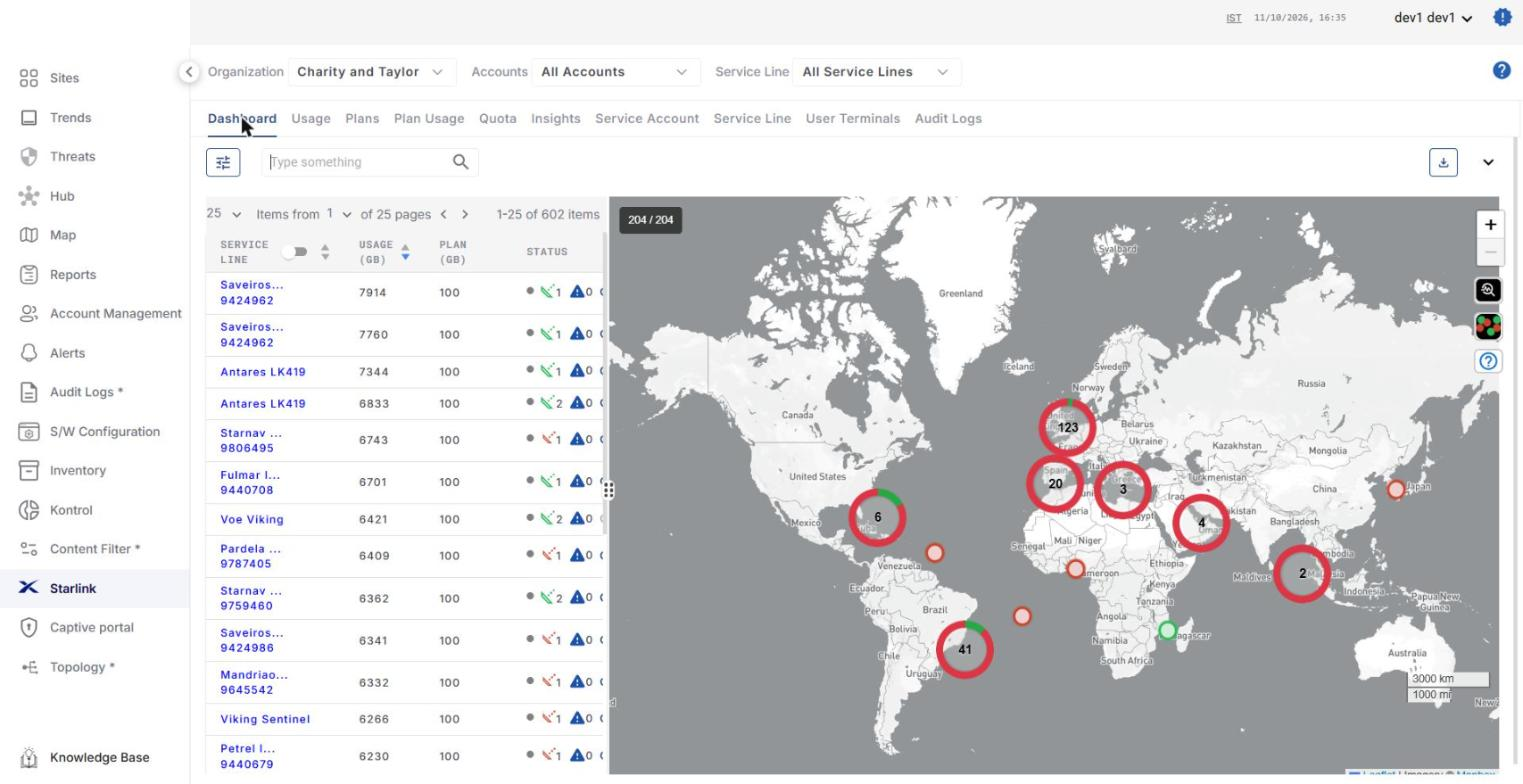
Select the Starlink option from the left menu bar. The Starlink screen opens.
-
In the Organization field, select the organization or sub-organization from the dropdown menu. The logged in user's organization is selected by default.
-
Select the Accounts from the dropdown menu.
-
Select the Service Line from the dropdown menu. All the service lines that the logged in user has access to are available in the dropdown menu.
-
Select the Service Account tab.
-
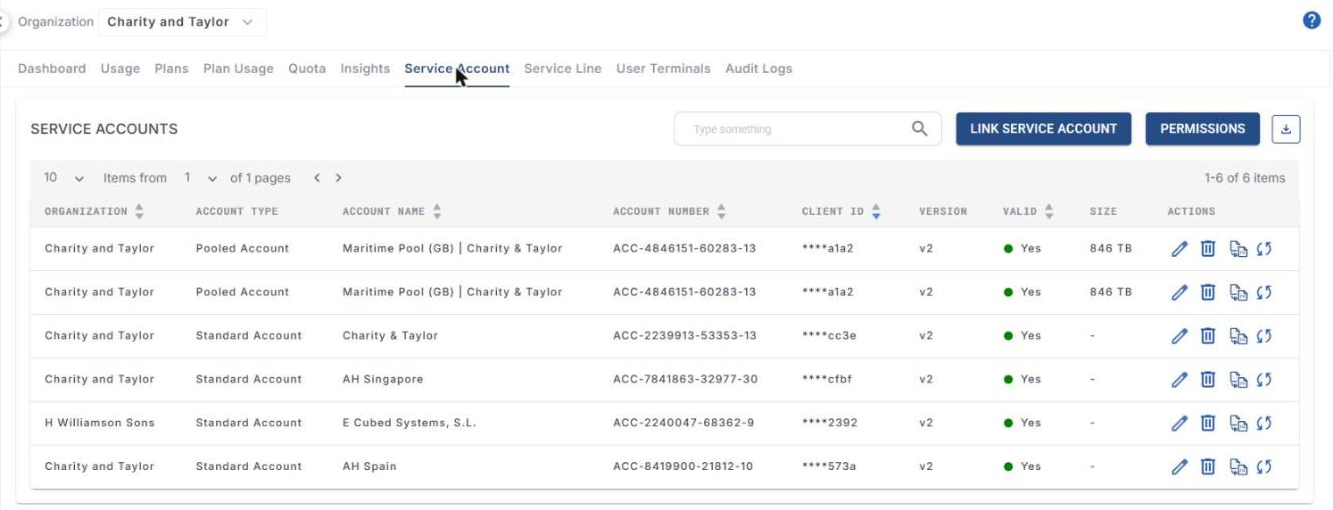
For every service account linked, a Standard Account entry is listed. The Account Type column shows whether the account is a Standard Account or a Pooled Account, and the Size column shows the pool size of pooled accounts.
-
The Search field can be used to search for the service accounts.
-
Click the Download icon to download the service account details.
Create a Pooled Account
-
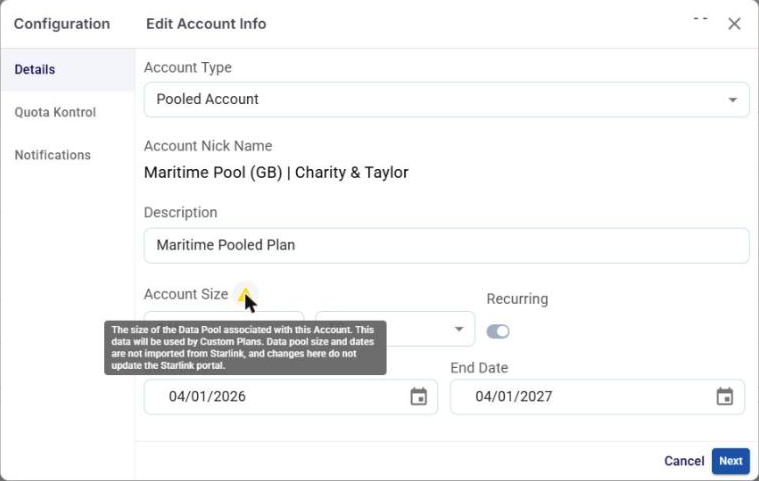
Click the Edit Pool Account icon in the Actions column of the required account. The Edit Account Info dialog box opens with the Details, Quota Kontrol and Notifications options in the side menu.
Details
-
In the Account Type field, select Pooled Account. (Select Standard Account to change a pooled account back to a standard account.)
-
The Account Nick Name of the service account is displayed.
-
Enter a Description for the pool.
-
Enter the Account Size and select the unit (GB/TB). Hover over the warning icon to view the note: the account size is the size of the data pool associated with this account and is used by the Custom Plans. The data pool size and dates are not imported from Starlink, and changes made here do not update the Starlink portal.
-
Enable the Recurring toggle to renew the pool automatically.
-
Select the Start Date and End Date using the date picker.
-
Click Next.
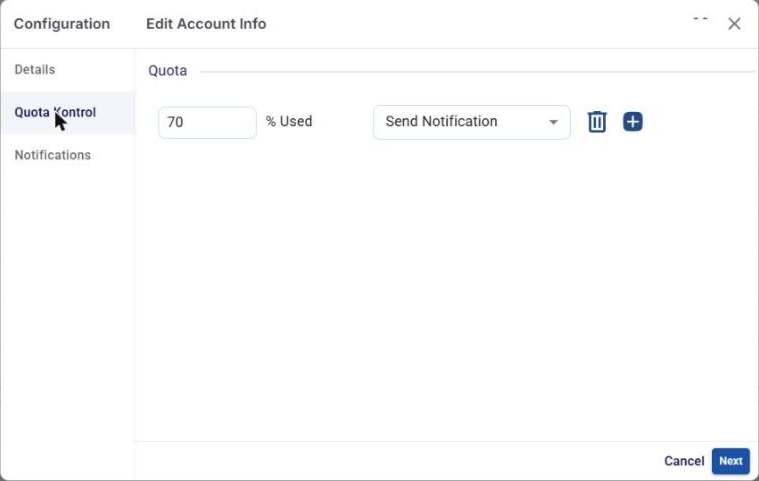
Quota Kontrol
-
In the % Used field, enter the target percentage of the pool usage.
-
Select Send Notification in the next field. A notification about the data usage will be sent when the data usage reaches the given percentage.
-
Click the + icon to add another action, or the Delete icon to remove an action.
-
Click Next.
Notifications
-
In the Pool or Plan Associated Email Addresses field, enter the email addresses to which the notifications should be sent and press Enter after each email address.
-
Click Save to save the pooled account. Click Cancel to close the dialog box without saving.
Once the pooled account is created, pools and plans can be added under it from the Plans tab. Refer to How To: Create Pools & Plans and How To: Add Pools/Plans under a Main Pool and Assign Pools/Plans to Service Lines for more information.