
Keywords: Starlink Pooled Plans, Service Line, Subscription, Operations, Mobile Priority, Quota Kontrol, Permissions, Orbit
Overview
This guide explains how to configure Starlink pooled plans and manage service lines from the Starlink (Orbit) screen of the CommBox Edge Cloud Portal. The pooled plans feature allows the main Starlink data quota to be divided into pools and plans with individual quota limits and Quota Kontrol actions, which are then assigned to service lines.
The overall workflow is as follows:
-
Link the Starlink service account - How To: Register for Starlink Cloud.
-
Create the main pooled account - How To: Create Pooled Account in Starlink Cloud.
-
Create pools and plans - How To: Create Pools & Plans.
-
Add pools/plans under the main pool and assign them to service lines - How To: Add Pools/Plans under a Main Pool and Assign Pools/Plans to Service Lines.
-
Manage the service lines from the Service Line tab - explained below.
Service Line Tab
Select Starlink from the left menu bar and click the Service Line tab. The service lines of the organization selected in the Organization field are listed.
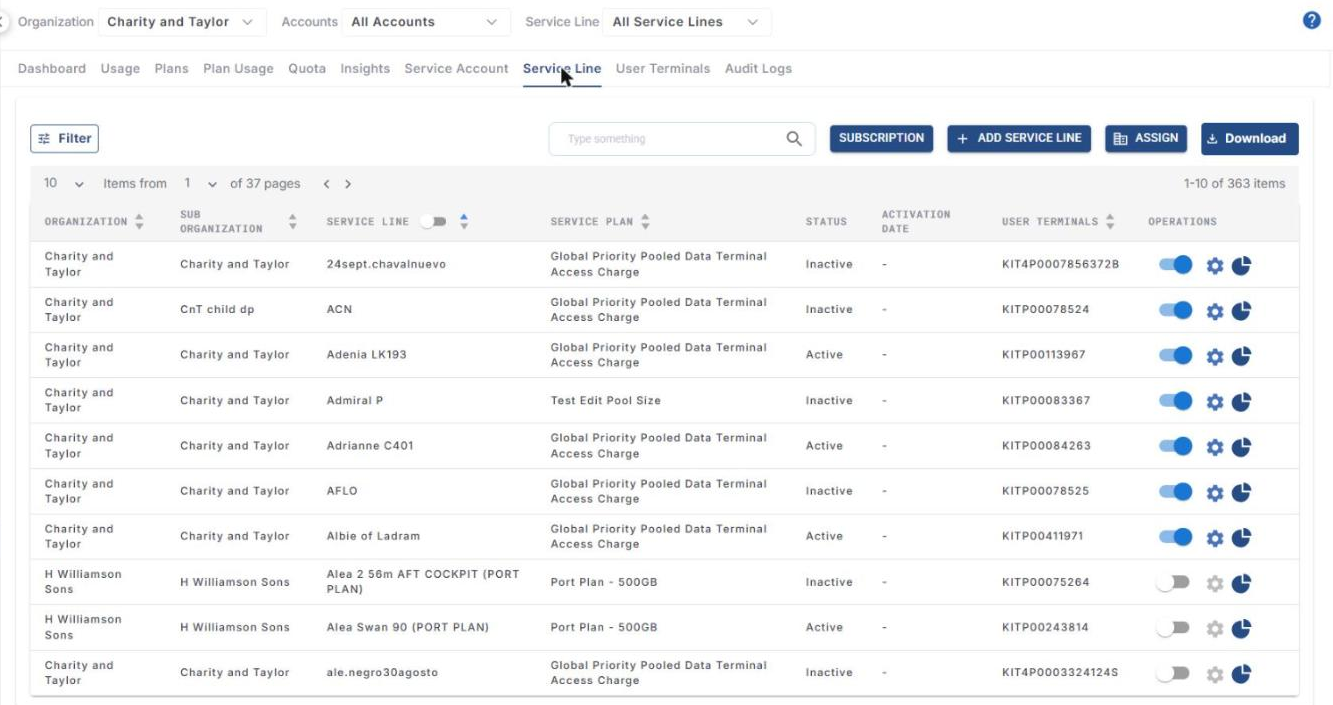
Service Line Tab Buttons
-
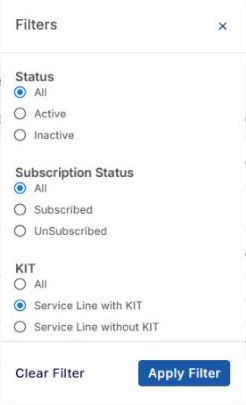
Filter - Filters the service lines by Status (All/Active/Inactive), Subscription Status (All/Subscribed/UnSubscribed) and KIT (All/Service Line with KIT/Service Line without KIT). Click Apply Filter to apply or Clear Filter to reset.
-
Search - Search the service lines.
-
Subscription - Subscribe service lines to the Starlink Cloud (explained below).
-
+ Add Service Line - Add a new service line. Refer to How To: Add a New Service Line, Assign to an Organization for more information.
-
Assign - Assign service lines to a sub-organization.
-
Download - Download the service line details.
Service Lines Table
The table shows the following information:
-
Organization - Organization of the service line.
-
Sub Organization - Sub-organization to which the service line is assigned.
-
Service Line - Name of the service line. Use the toggle in the column header to switch between the service line name and number.
-
Service Plan - Plan assigned to the service line.
-
Status - Active/Inactive.
-
Activation Date - Date on which the service line was activated.
-
User Terminals - KIT number(s) of the terminals in the service line.
-
Operations - Contains the following controls:
-
Starlink Cloud subscription toggle - Shows whether the service line is subscribed to the Starlink Cloud (hover to view the status, for example Starlink Cloud : Subscribed) and is used to subscribe/unsubscribe it.
-
Settings (gear) icon - Opens the Operations dialog box. The icon is enabled only for subscribed service lines.
-
Go to Quota Kontrol icon - Opens the Quota Kontrol details of the service line.
-
Starlink Subscription
Service lines must be subscribed to the Starlink Cloud to view their data and perform operations. There are three ways to subscribe service lines:
Method 1: Subscribe service lines individually
Turn on the subscription toggle in the Operations column of the service line.
Method 2: Subscribe multiple service lines
-
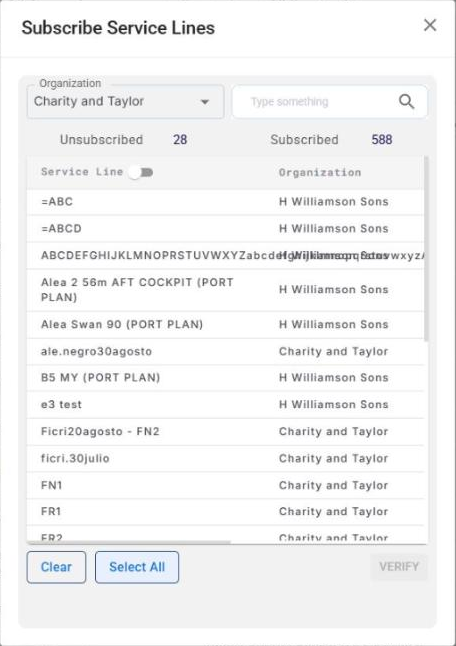
Click the Subscription button. The Subscribe Service Lines dialog box opens.
-
Select the Organization and use the search field to find the service lines. The number of Unsubscribed and Subscribed service lines is shown.
-
Select the required service lines or click Select All. Click Clear to clear the selection.
-
Click Verify to continue with the subscription.
Method 3: Subscribe all the service lines of a service account
-
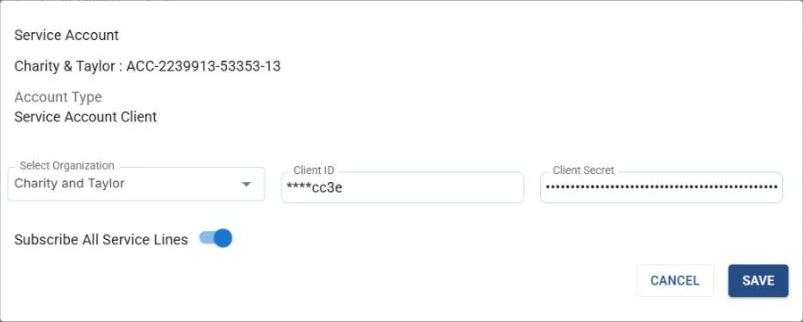
Select the Service Account tab and click the Edit icon of the service account.
-
Turn on the Subscribe All Service Lines toggle.
-
Click Save.
Operations
Click the Settings (gear) icon in the Operations column of a service line. The Operations dialog box opens with the name of the service line at the top and the following options in the side menu.
Service Line Details
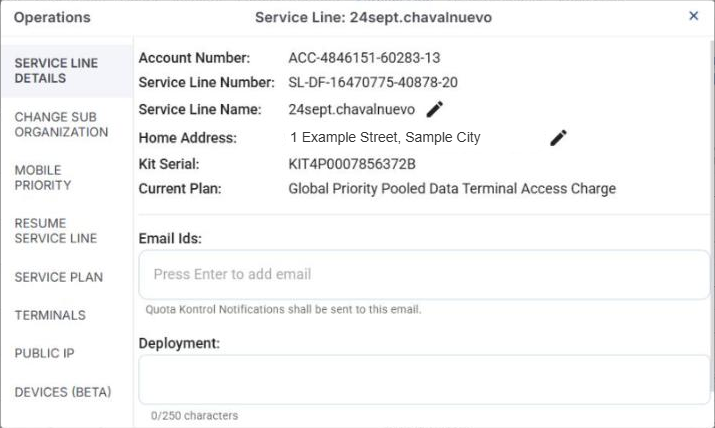
Shows the Account Number, Service Line Number, Service Line Name, Home Address, Kit Serial and Current Plan. Click the pencil icon to edit the Service Line Name or Home Address. The Email Ids field is used to add the email addresses to which the Quota Kontrol notifications of the service line are sent, and the Deployment field (up to 250 characters) is used to describe the deployment.
Change Sub Organization
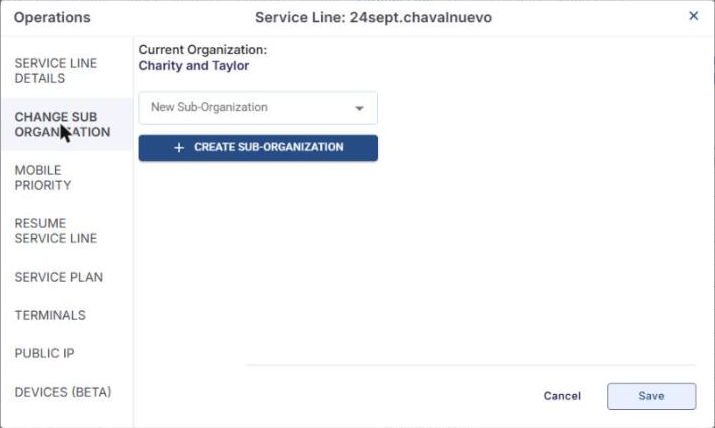
Shows the Current Organization of the service line. Select the new sub-organization from the dropdown menu, or click + Create Sub-Organization to create a new one, and click Save.
Mobile Priority
Use the Disabled/Enabled toggle to opt the service line in or out of Mobile Priority data. When the site is located close to the shore within a preset distance, the site uses standard data to access the internet. When the site travels beyond this distance, it can access the internet only using Mobile Priority data.
Pause / Resume Service Line
Pauses an active service line or resumes a paused service line. For a paused service line, the option is shown as Resume Service Line: select the product in the Select Products field and click Resume.
Service Plan
Shows the Account and Terminal of the service line. Select the new plan in the Plan field and click Assign Plan.
Terminals
Lists the Associated Terminals of the service line (S.No., Starlink KIT number). Click the Reboot icon in the Actions column to reboot a terminal.
Public IP
Use the Default/Public IP toggle to enable or disable a public IP for the service line.
Devices (Beta)
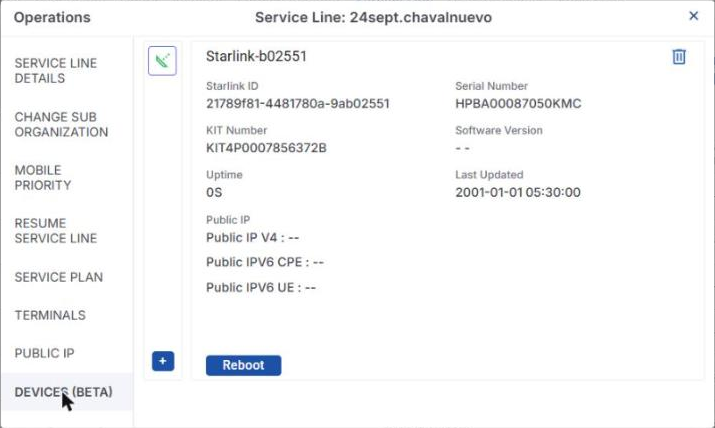
Shows the Starlink devices of the service line with the Starlink ID, Serial Number, KIT Number, Software Version, Uptime, Last Updated and Public IP (IPv4, IPv6 CPE, IPv6 UE) details. Use the Reboot button to reboot the device, the Delete icon to remove the device from the service line, and the + icon to add a Starlink device.
Starlink User Permissions
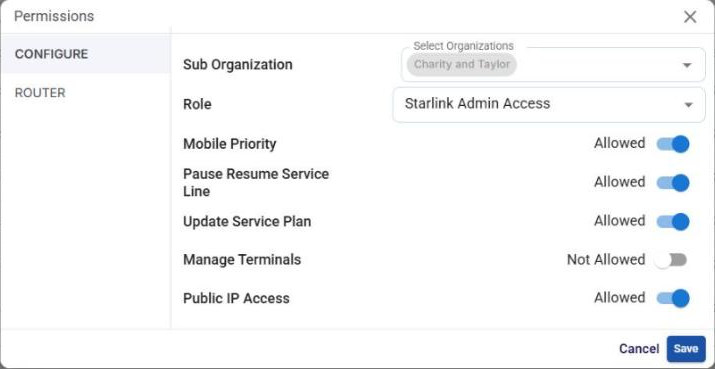
The Starlink role and the operations allowed for the users of an organization are set from the Service Account tab → Permissions button. Select the Sub Organization, the Role (Starlink Access, Starlink Admin Access or Starlink Full Access), and set the Mobile Priority, Pause Resume Service Line, Update Service Plan, Manage Terminals and Public IP Access operations to Allowed or Not Allowed. Click Save.
Users are added to the organization from Account Management in the CommBox Edge Cloud Portal. Refer to the Account Management guides for more information.