Keywords: Starlink Cloud, CommBox Edge Cloud Portal, Orbit, Service Account, Link Service Account, Sub-Organization, Permissions
Overview
This guide explains how to register and integrate Starlink Cloud services with the CommBox Edge Cloud Portal platform. It covers creating a Starlink service account from the Starlink account homepage, linking that service account in the CommBox Edge Cloud Portal using the Service Account Client method, associating Starlink service lines with a sub-organization, and setting the Starlink permissions for the users of an organization. By following this guide, you will be able to connect your Starlink Cloud data source into CommBox Edge Cloud Portal for centralized monitoring, analytics, and quota management.
1 How To Create a New Service Account From Starlink Account Homepage
To create a Service Account from the Starlink Account Homepage, follow the below steps:
-
Open the Starlink account home page. Login with the valid Starlink account credentials.
-
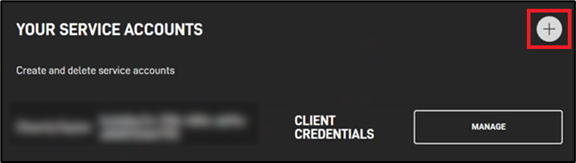
Scroll down to the "Your Service Accounts" section.
-
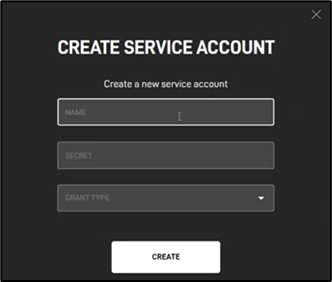
Select the "+" in the top right corner to create a new service account. The Create Service Account dialog box opens.
-
If you do not see the section "Your Service Accounts" reach out to your Starlink account manager to inquire about access.
-
Fill in the following fields as applicable:
-
"Name" - Name for the service account
-
"Secret" - The secret for the service account that will be used for authentication
-
"Grant Type" - Select "Client Credentials".
-
-
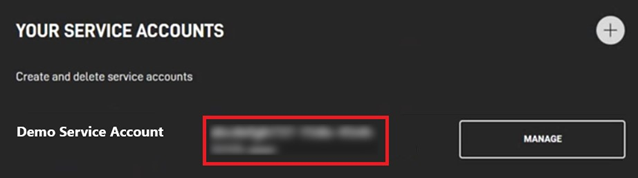
Now that the service account is created, a system-generated client ID will populate. The client ID will be displayed in the "Your Service Accounts" section on the Starlink Account Homepage.
-
This client ID can be used in combination with your client secret to request an authorization token to be able to call available API end points.
2 How to Link the Service Account To CommBox Edge Cloud Portal
-
Login to the CommBox Edge Cloud Portal using valid credentials.
-
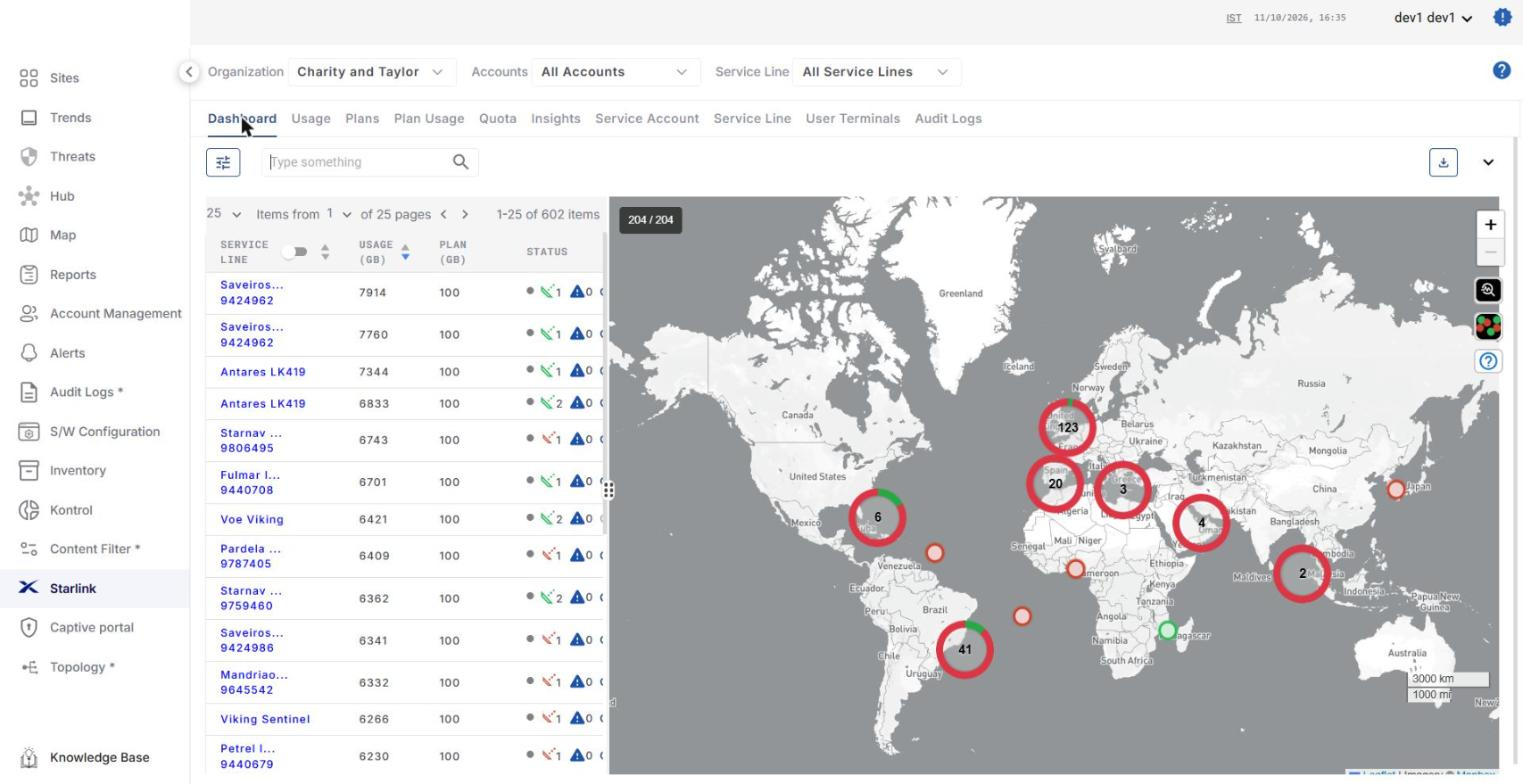
Select the Starlink option from the left menu bar. The Starlink screen opens with the Dashboard tab selected by default.
-
The Organization, Accounts and Service Line filters at the top of the screen are used to filter the data shown in all the tabs.
-
The Starlink screen has the following tabs: Dashboard, Usage, Plans, Plan Usage, Quota, Insights, Service Account, Service Line, User Terminals and Audit Logs.
-
-
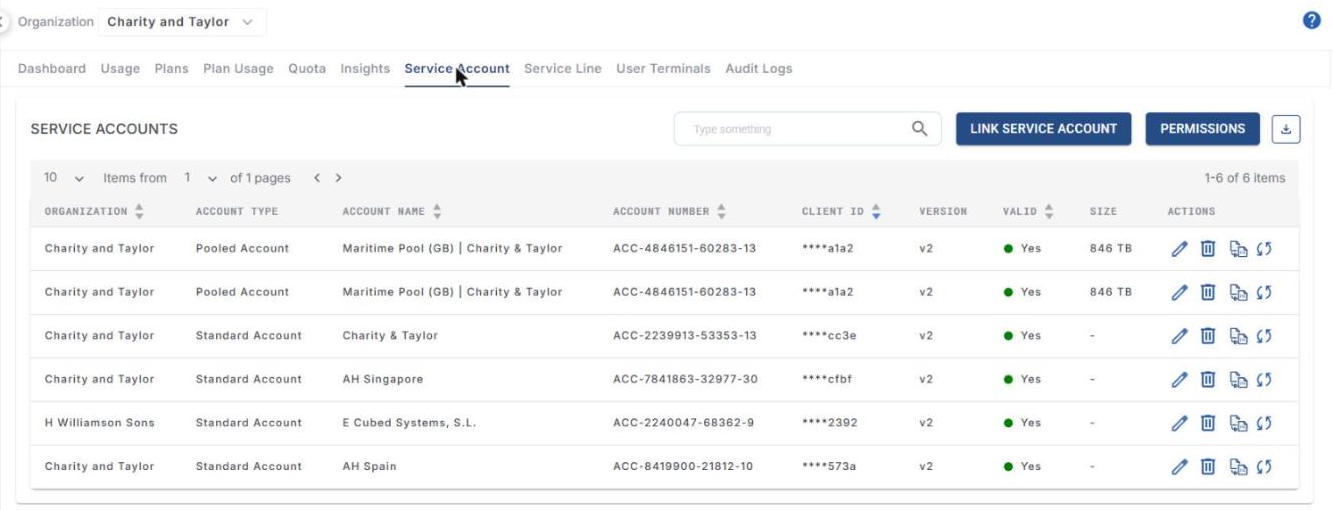
Click the Service Account tab to open the Service Accounts screen. The table lists all the service accounts linked to the selected organization with the following details: Organization, Account Type (Standard Account/Pooled Account), Account Name, Account Number, Client ID (masked), Version, Valid (Yes/No - shows whether the credentials are valid), Size (pool size, for pooled accounts) and Actions.
-
The Actions column has the following icons:
-
Edit - Edit the organization, Client ID and Client Secret of the service account, and enable/disable Subscribe All Service Lines.
-
Delete - Delete the linked service account.
-
Edit Pool Account - Edit the account information (Standard/Pooled account, size, dates, Quota Kontrol and Notifications). Refer to How To: Create Pooled Account in Starlink Cloud for more information.
-
Sync Starlink Account - Sync the service lines and terminals of the account from Starlink.
-
-
Use the Search field to search the service accounts and the Download icon to download the service account details.
2.1 Link a Service Account (Service Account Client)
If the user is a reseller of Starlink services and/or has Starlink API telemetry access, the user will be given a Client ID and Client Secret to access the Starlink Cloud Telemetry API. Please reach out to Starlink directly for any API access issues. To use this method, first create a service account from the Starlink Account Homepage as explained in section 1.
-
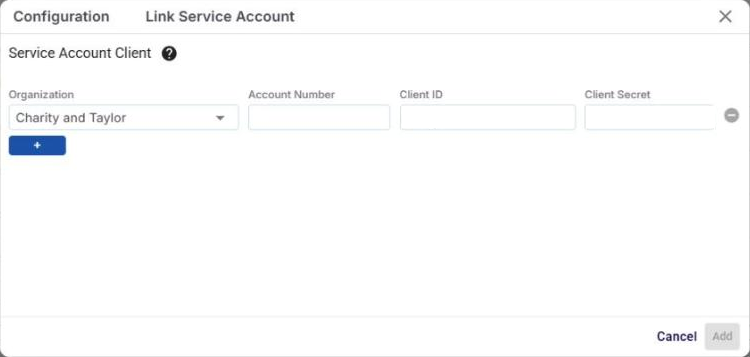
Click Link Service Account. The Link Service Account dialog box opens with the Service Account Client section. Hover over the ? icon to view the steps to set up API access in the Starlink account.
-
Select the Organization to which the service account should be linked.
-
Enter the Starlink Account Number.
-
Enter the Client ID generated while creating the Starlink service account.
-
Enter the Client Secret provided while creating the Starlink service account.
-
Click the + button to add another service account in the same dialog box, if required. Use the − icon to remove a row.
-
Click Add. The system validates the credentials and links the service account. The linked account is listed in the Service Accounts table and its service lines are listed in the Service Line tab.
The Web Portal (email/password) method is no longer available. Service accounts can be linked only using the Service Account Client (Client ID and Client Secret) method.
3 How to Associate Service Line to Sub-Organization
By default, the service lines of a service account are associated with the organization to which the service account is linked. Follow the below steps to associate service lines with a sub-organization:
-
Select the Service Line tab from the Starlink screen.
-
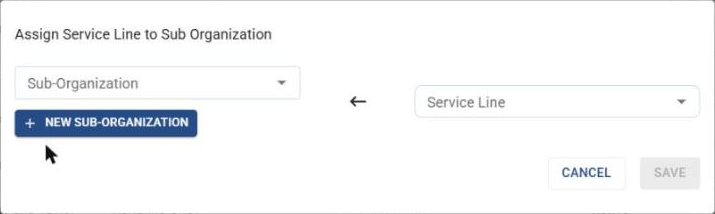
Click the Assign button. The Assign Service Line to Sub Organization dialog box opens.
-
Select the Sub-Organization from the dropdown menu. The dropdown menu consists of all the available sub-organizations.
-
Select one or more Service Lines from the dropdown menu.
-
Click Save to associate the service lines with the selected sub-organization.
To associate the service lines with a new sub-organization:
-
Click the + New Sub-Organization button.
-
Select the Parent Organization from the dropdown menu.
-
Enter the Sub-Organization Name.
-
Click Create. The new sub-organization will be created and can be selected in the Sub-Organization field. Click Cancel to go back without creating.
-
Select the service lines and click Save.
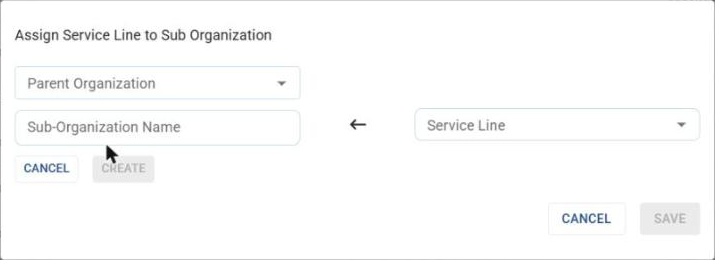
A single service line can also be moved to another sub-organization from the Operations dialog (settings icon in the Service Line table) → Change Sub Organization.
4 Starlink Permissions
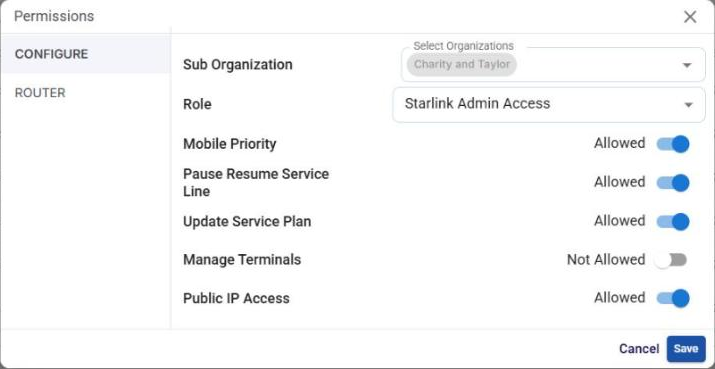
The Permissions button in the Service Account tab is used to set the Starlink role and operation permissions for an organization.
-
Click Permissions. The Permissions dialog box opens with the Configure tab selected.
-
Select the Sub Organization(s).
-
Select the Role: Starlink Access, Starlink Admin Access or Starlink Full Access.
-
Set each operation to Allowed or Not Allowed using the toggles: Mobile Priority, Pause Resume Service Line, Update Service Plan, Manage Terminals and Public IP Access.
-
In the Router tab, select the Organization and enable/disable Config Library Visibility.
-
Click Save.