
Keywords: Plan Hierarchy, Assignment, Bulk Assignment, Pools, Plans, Service Lines, Starlink Cloud, Orbit
Overview
This guide explains how to add pools and plans under an existing main pool (pooled account) and assign those pools/plans to Starlink service lines within the CommBox Edge Cloud Portal portal. It covers the Accounts, Pools, & Plans - Hierarchy section of the Plans tab, the Assignment dialog box used to add pools/plans under a pool, and the Bulk Service Line Plan Assignment dialog box used to move service lines between pools/plans.
Add Pools/Plans under a Main Pool
-
Select Starlink from the left menu bar and click the Plans tab.
-
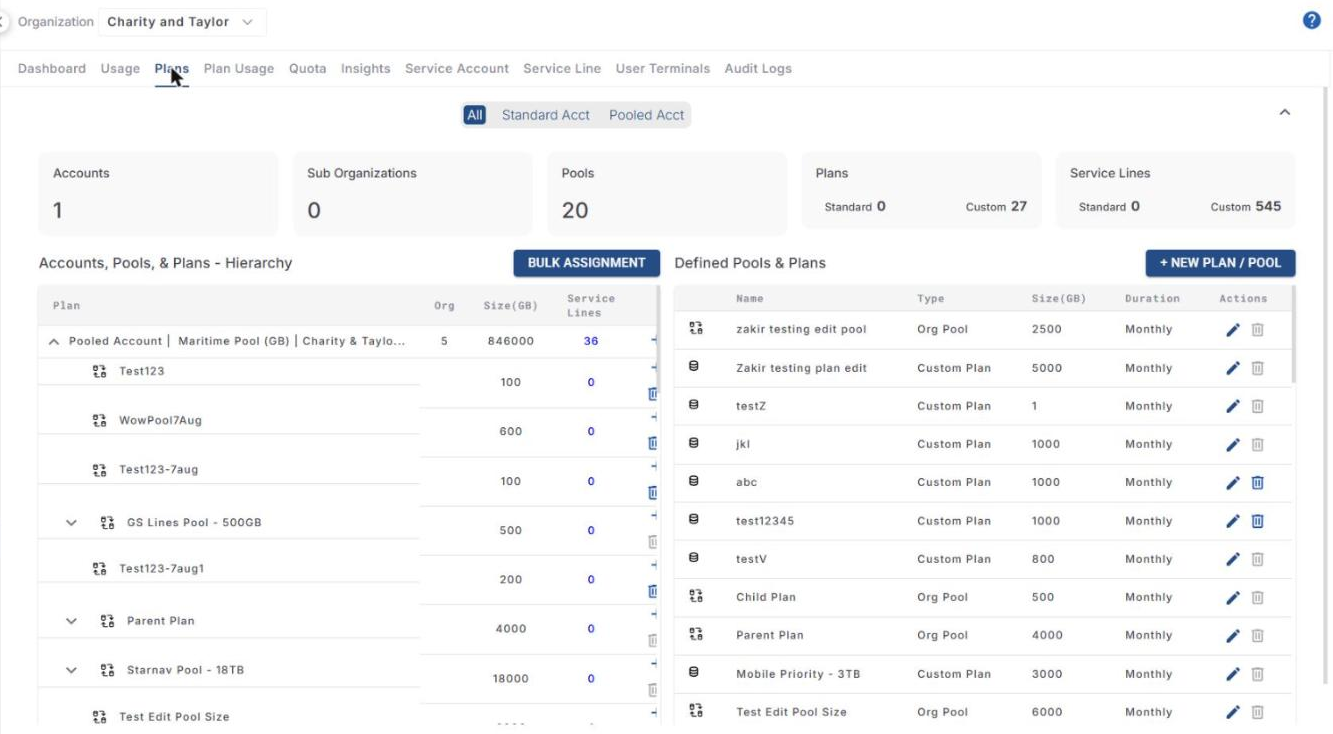
The Accounts, Pools, & Plans - Hierarchy section shows the pooled accounts of the selected organization and the pools and plans added under them. The table shows the following information:
-
Plan - Name of the pooled account, pool or plan.
-
Org - Number of organizations associated.
-
Size (GB) - Size of data allocated.
-
Service Lines - Number of service lines associated.
-
-
Click the arrow icon next to the name of a pooled account or pool to expand/collapse it and view the pools and plans under it.
-
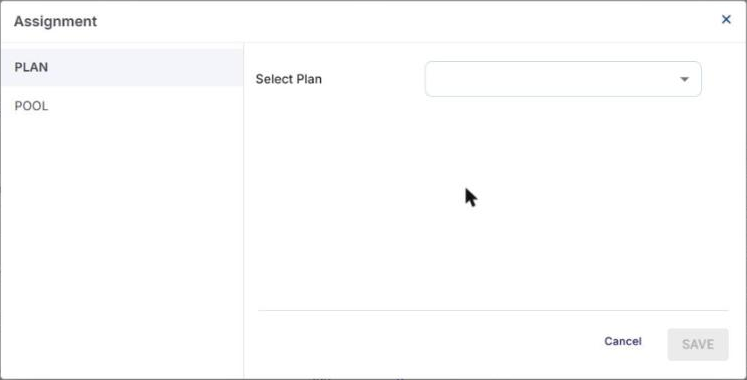
Click the Add (+) icon of the pooled account or pool under which a pool/plan should be added. The Assignment dialog box opens.
-
Select the Plan option from the side menu and choose the required plan in the Select Plan field, or select the Pool option and choose the required pool in the Select Pool field. The pools and plans created in the Defined Pools & Plans section are available here.
-
Click Save to add the selected pool/plan. Click Cancel to close without saving.
-
To remove a pool/plan from the hierarchy, click its Delete Pool icon.
Assign Pool/Plan to Service Lines
The Bulk Assignment button is used to assign service lines to the created pools/plans, or to move service lines from one pool/plan to another.
-
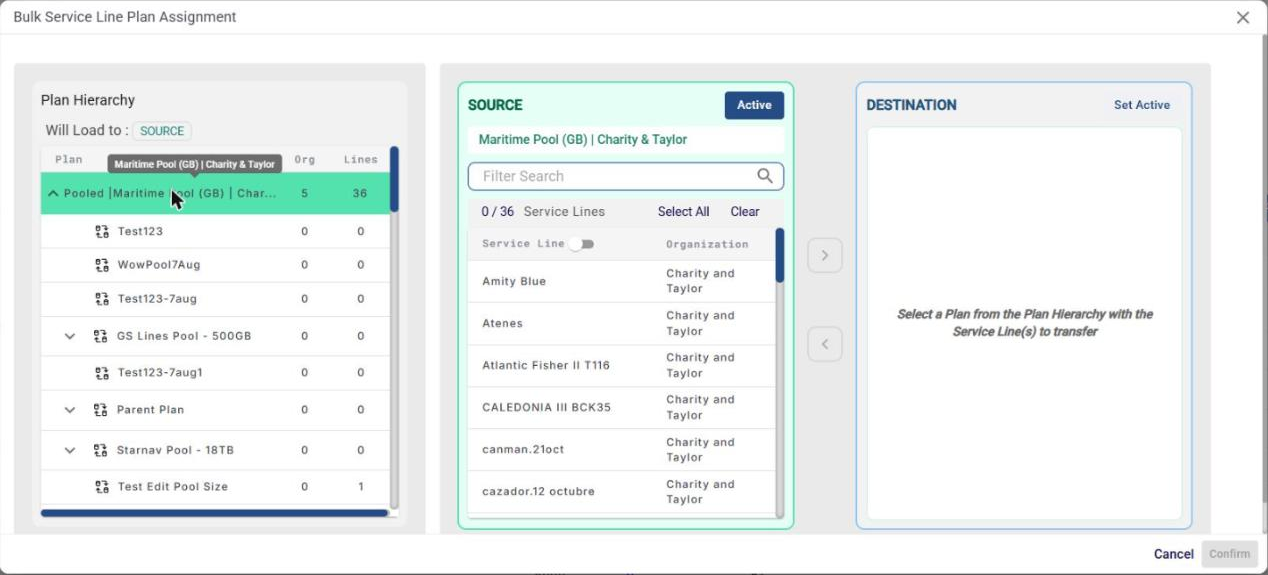
Click the Bulk Assignment button. The Bulk Service Line Plan Assignment dialog box opens with the Plan Hierarchy, Source and Destination sections.
-
The Source section (green) is active by default, as shown by Will Load to: SOURCE in the Plan Hierarchy section.
-
In the Plan Hierarchy section, select the pool/plan from which the service lines should be moved. The selected entry is highlighted in green and its name and service lines are shown in the Source section.
-
Use the Filter Search field to search the service lines. Select the required service lines, or use Select All/Clear. The number of selected service lines is shown (for example, 0 / 36 Service Lines).
-
Click Set Active in the Destination section (blue).
-
In the Plan Hierarchy section, select the pool/plan to which the service lines should be moved. Its name and service lines are shown in the Destination section.
-
Click the > arrow to move the selected service lines from the Source to the Destination. Use the < arrow to move them back.
-
Click Confirm to apply the new pool/plan to the selected service lines. Click Cancel to close without saving.
The plan of a single service line can also be changed from the Service Line tab → settings icon → Operations → Service Plan.