
Goal: keep a site online when its main internet link drops. You rank the site's WAN links (for example Starlink first, then a second Starlink or cellular), and the device moves traffic to the next working link automatically, then back when the main link recovers.
Applies to: CommBox EdgeOS 8.x (Konnect) device portal. A note at the end of each step gives the CommBox CoreOS menu path where it differs.
Time: about 15 minutes, plus a short test.
How failover works
Failover is controlled by a WAN profile. The profile ranks the WAN links into priority rows. Each LAN network uses one WAN profile, so different networks can fail over differently (for example crew Wi-Fi and operations traffic).
-
Traffic uses the link in the highest row that's working.
-
The device checks each link with probes. When probes say the link is down, traffic moves to the next row.
-
Putting more than one link in the same row uses them together instead of as a backup (the portal marks this row Dynamic).
Before you begin
-
At least two WAN links are configured on the device and show in Interfaces > Physical Interfaces. See How To: Set up a new site.
-
You know which link is primary and the order the backups should take over in. Ask the customer, especially if a backup link is metered or costs more.
-
You can sign in to the device portal as an administrator.
-
For the test in Step 5, plan a short window when a brief drop in connectivity is acceptable.
Step 1: Check how each link is probed
Probes decide when a link counts as down, so check them before you build the profile.
-
Go to Interfaces > Physical Interfaces.
-
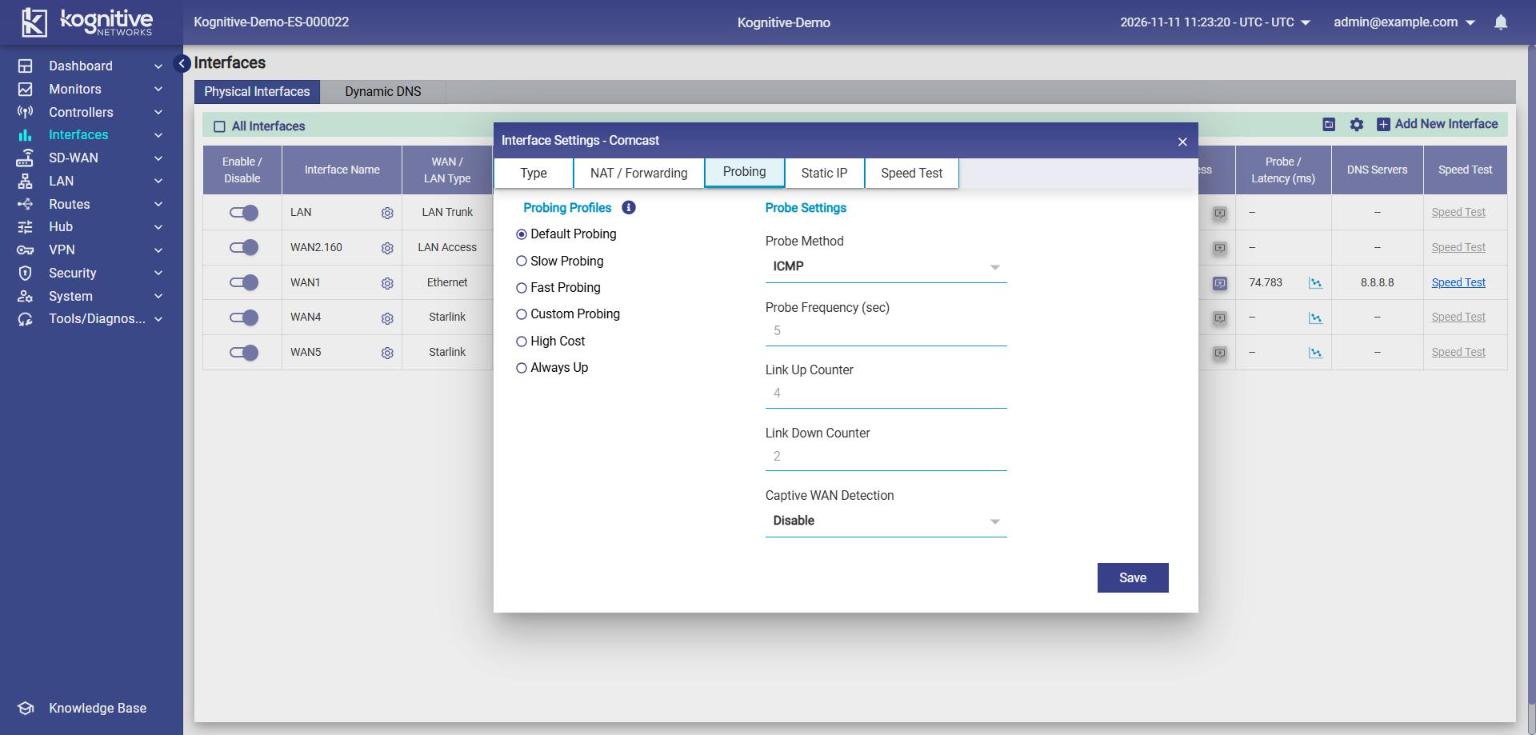
Click the gear icon next to a WAN and open the Probing tab.
-
Review the Probing Profile (Default, Slow, Fast, Custom, High Cost or Always Up) and the Probe Settings: Probe Method, Probe Frequency (sec), Link Up Counter and Link Down Counter.
-
To change them, close the dialog, turn off the interface's Enable/Disable toggle, make the change, click Save, then turn the toggle back on. Settings can only be edited while the interface is disabled.
-
Repeat for each WAN that will be part of failover.
Step 2: Create the failover profile
-
Go to SD-WAN > WAN Profiles.
-
Click + Profile and enter a Profile Name people will recognize, for example Failover or Starlink-Failover. To change an existing profile, select it from the list instead.
-
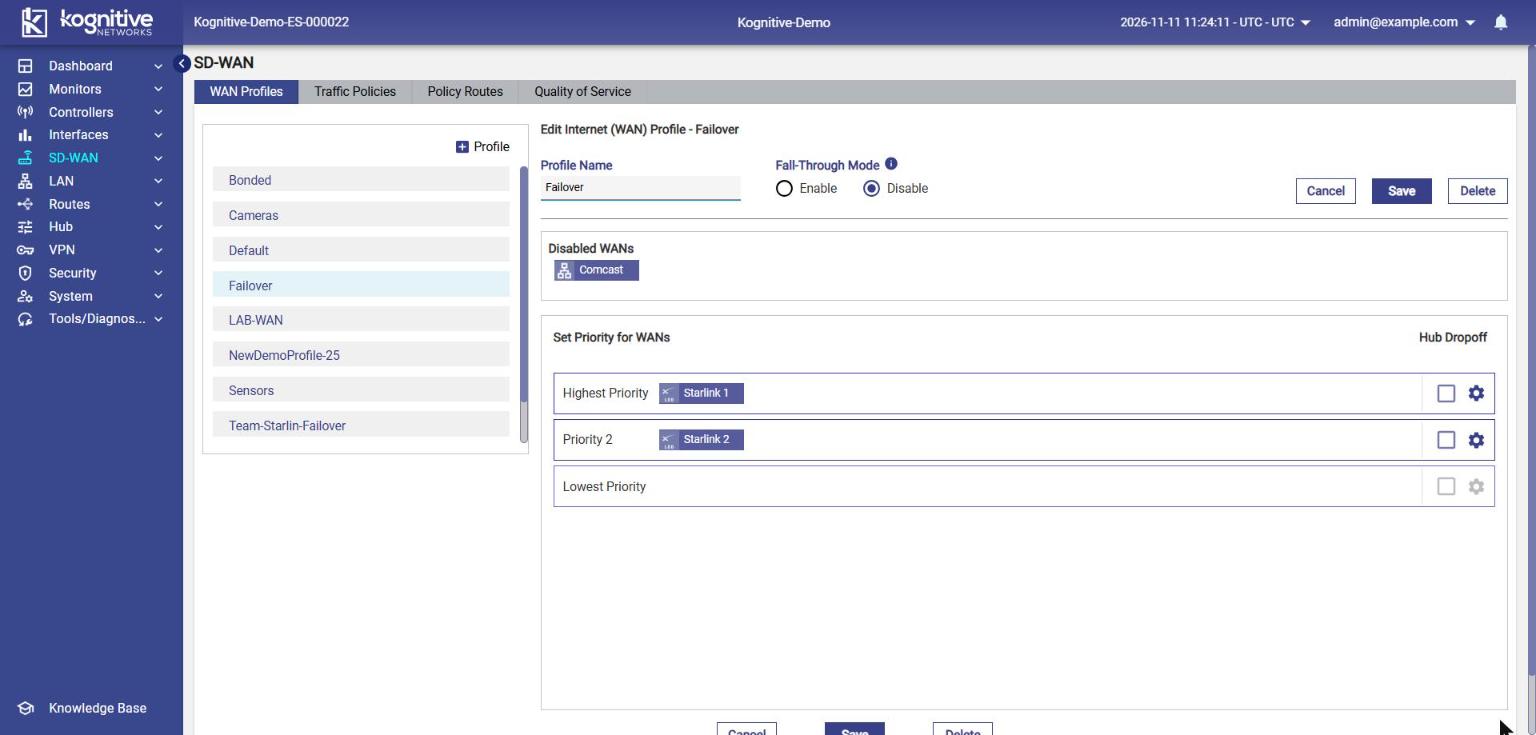
Drag the primary link into Highest Priority.
-
Drag the first backup into Priority 2, and a second backup (if any) into Lowest Priority. Put only one link in each row for a straight failover.
-
Drag any link this profile must never use into Disabled WANs.
-
Set Fall-Through Mode. Hover over its info icon to see what each option does before you choose.
-
Click Save.
In this example, Starlink 1 is the primary, Starlink 2 takes over if it drops, and Comcast isn't used by this profile:
CommBox CoreOS: SD-WAN > Priority list. Links the profile doesn't use appear under Available WANs.
[Screenshot to add: CommBox CoreOS SD-WAN > Priority list]
Step 3: Assign the profile to your LAN networks
A profile does nothing until a network uses it.
-
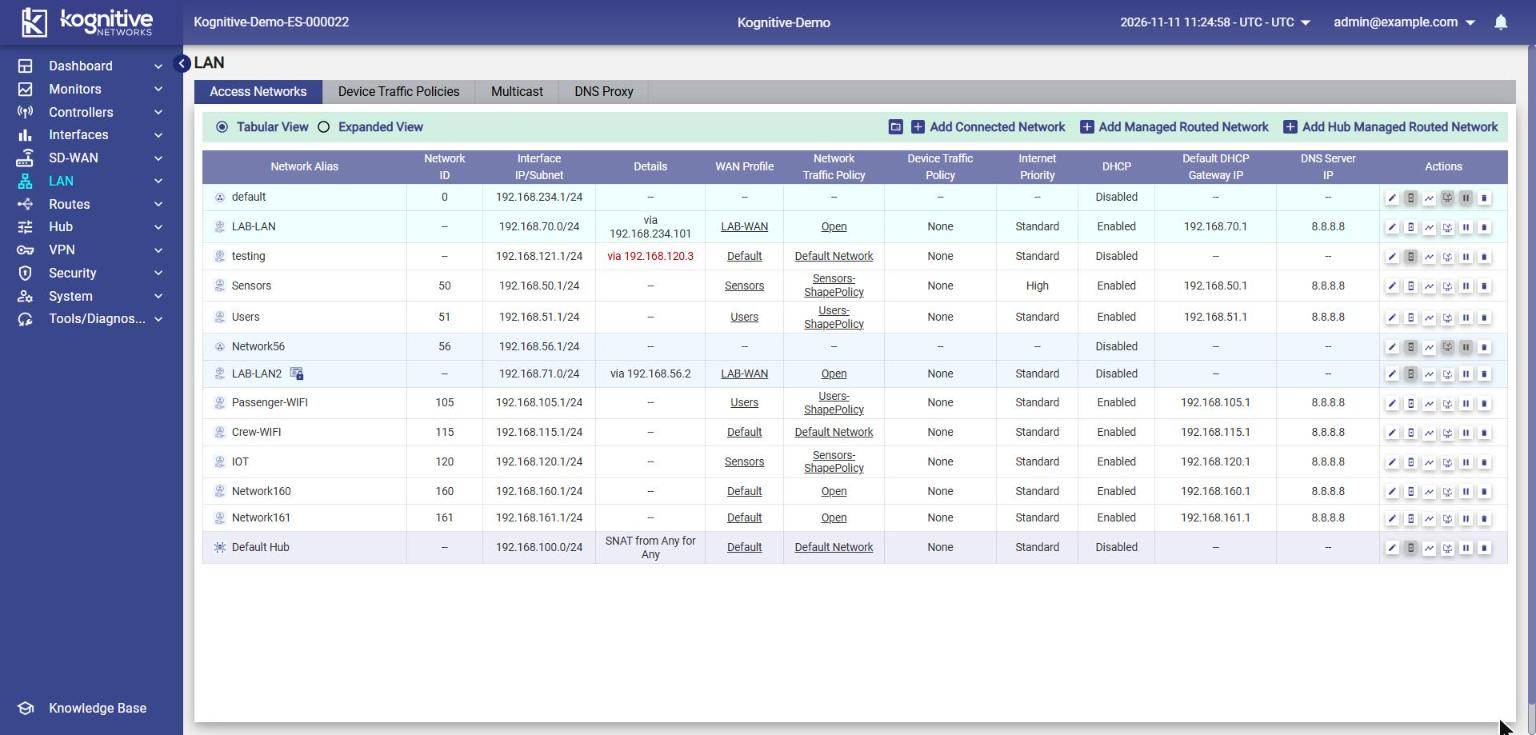
Go to LAN > Access Networks. The WAN Profile column shows which profile each network uses.
-
Click the edit icon in the Actions column for the network.
-
Under WAN Profile and Traffic Policies, select your failover profile in WAN Profile.
-
Click Save. Repeat for every network that should fail over.
Step 4: Confirm which networks use the profile
-
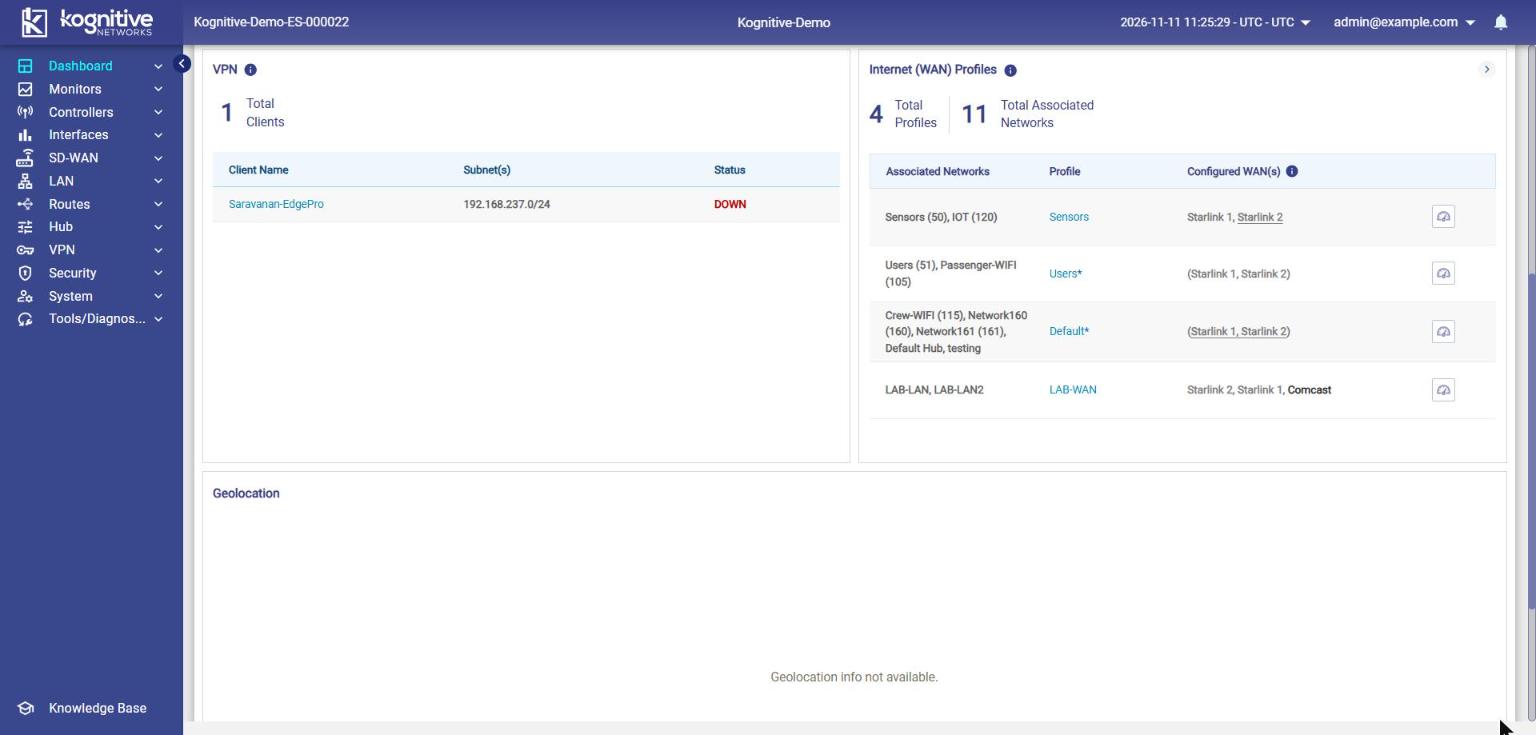
Go to Dashboard > Internet Status.
-
Under Internet (WAN) Profiles, find your profile and check the Associated Networks and Configured WAN(s).
Step 5: Test the failover
Only test during the window you agreed, because users on the site will see a brief drop.
-
On Dashboard > Internet Status, note that the primary link is up and carrying traffic.
-
Take the primary link down: disconnect its cable or terminal, or turn off its toggle in Interfaces > Physical Interfaces.
-
Wait for the probes to mark it down, then check that usage moves to the backup link and a device on the LAN can still browse.
-
Restore the primary link. Check that it comes back up and traffic returns to it.
Check that it worked
-
The profile lists the links in the order the customer wants, with unused links under Disabled WANs.
-
Every network that should fail over shows the profile in its WAN Profile column.
-
When the primary link went down in the test, traffic moved to the backup and came back when it recovered.
Troubleshooting
|
Problem |
Likely cause |
What to do |
|---|---|---|
|
Traffic doesn't move to the backup |
The network uses a different profile, or the backup is in Disabled WANs |
Check the WAN Profile column in LAN > Access Networks, and the backup's row in the profile. |
|
Failover is slow |
The probing profile checks the link too rarely, or needs many failed probes |
Review the Probing tab for the primary link (Step 1). |
|
Traffic switches back and forth |
The primary link is unstable and keeps passing and failing probes |
Check the primary link's signal or connection, and review its Link Up Counter. |
|
Both links carry traffic at once |
Both links are in the same priority row |
Move the backup to Priority 2. |
|
Can't edit probe settings |
The interface is enabled |
Turn off its toggle, edit, save, then turn it back on. |
Related pages
-
How To: Set up a new site
-
Physical Interfaces: field reference
-
SD-WAN WAN Profiles: field reference