Keywords: CommBox EdgeOS, Captive Access Network, CAN, Admin Portal, User Portal, Self Sign Up
Overview
This guide explains how to create a Captive Access Network (CAN) on an CommBox EdgeOS 8.x device and set up the plans and user accounts in the CAN Administration Portal, so that users must log in to the captive portal before they get internet access.
Captive Portal: Create a Captive Access Network
1. Create a Network Traffic Policy
-
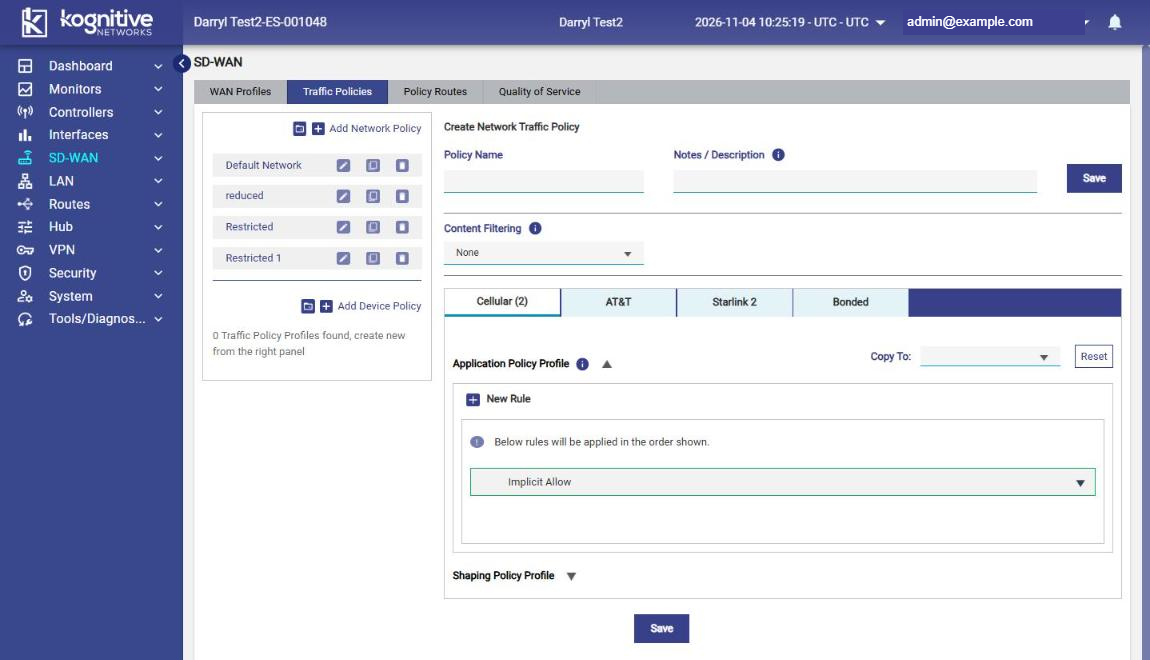
Log in to the CommBox EdgeOS portal and select SD-WAN > Traffic Policies.
-
Click Add Network Policy.
-
Enter the Policy Name, for example “CaptiveNetworkBlock”.
-
Click Save.
Leave this policy empty (do not add any rules). Traffic from users who are not logged in is redirected to the Captive Portal login page.
2. Create a Device Traffic Policy
Create a device traffic policy for the devices that log in to the CAN. Its name must match exactly the Device Traffic Policy / Identity Rule of the plan in the CAN Administration Portal (step 5).
-
In SD-WAN > Traffic Policies, click Add Device Policy.
-
Enter the Policy Name (for example “CaptiveDevicePolicy”), configure the shaping and application rules the logged-in users should get, and click Save.
3. Enable Captive Access on the Access Network
-
Select LAN > Access Networks.
-
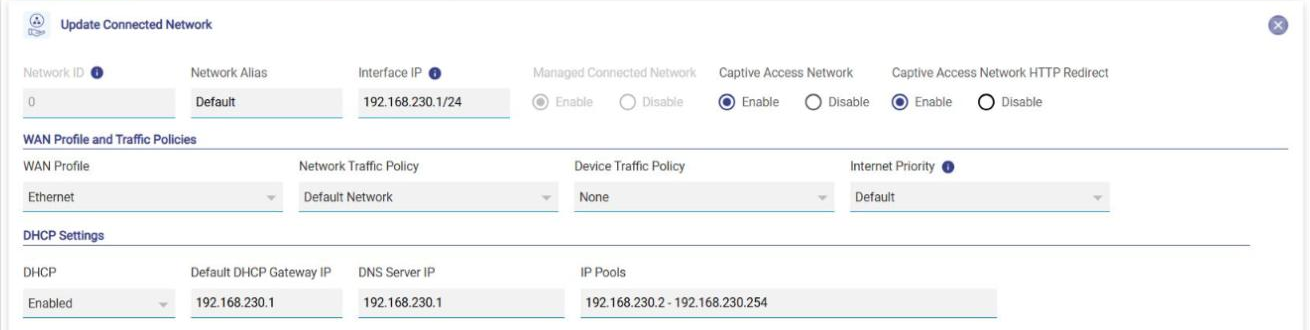
Click Add Connected Network to create a new network, or click the pencil icon of the access network that should be captive. The Update Connected Network form opens.
-
Set Captive Access Network to Enable.
-
Captive Access Network HTTP Redirect is set to Enable automatically, so HTTP requests are redirected to the Captive Portal login page. Users must log in with valid credentials to get internet access.
When HTTP redirect is enabled, HTTPS traffic is blocked and HTTP traffic is redirected to the Captive Access Network User Portal until the user logs in.
4. Assign the Network Traffic Policy
-
In the same form, under WAN Profile and Traffic Policies, set Network Traffic Policy to the policy from step 1 (for example CaptiveNetworkBlock).
-
Set Device Traffic Policy to None.
-
Click Save. The network now shows the captive icon next to its alias in the Access Networks list.

5. Create a Plan in the CAN Administration Portal
-
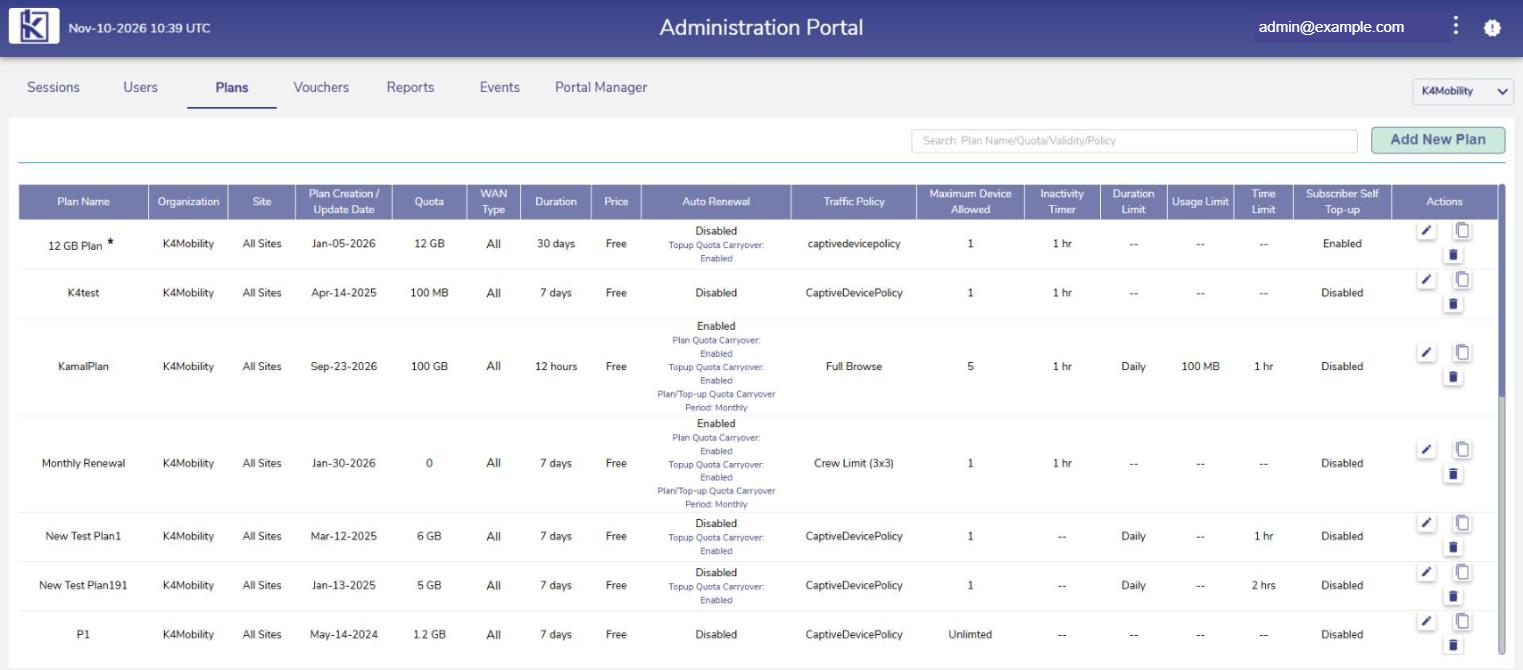
In the CAN Administration Portal, open the Plans tab and click Add New Plan. The Add New Subscription Plan dialog opens on the Config tab.
-
Is this the Default Plan for Admin created Users? - select Yes to make it the default plan for new admin-created users.
-
Site - All Sites (Organization) or a specific site.
-
Plan Name.
-
Duration - No End Date, Monthly, Custom (Dates) or Custom (Duration) (default: Custom (Duration), 7 Days). The validity starts when the service starts.
-
Maximum Devices Allowed - 1 to 5 or Unlimited; the number of devices that can be logged in with the same credentials at the same time.
-
Quota - the data allowance, in MB or GB.
-
Device Traffic Policy / Identity Rule - the device traffic policy from step 2; it must match the name on the CommBox EdgeOS device exactly.
-
WAN Type (Optional) and WAN Profile (Optional) - restrict the plan to a WAN type or WAN profile.
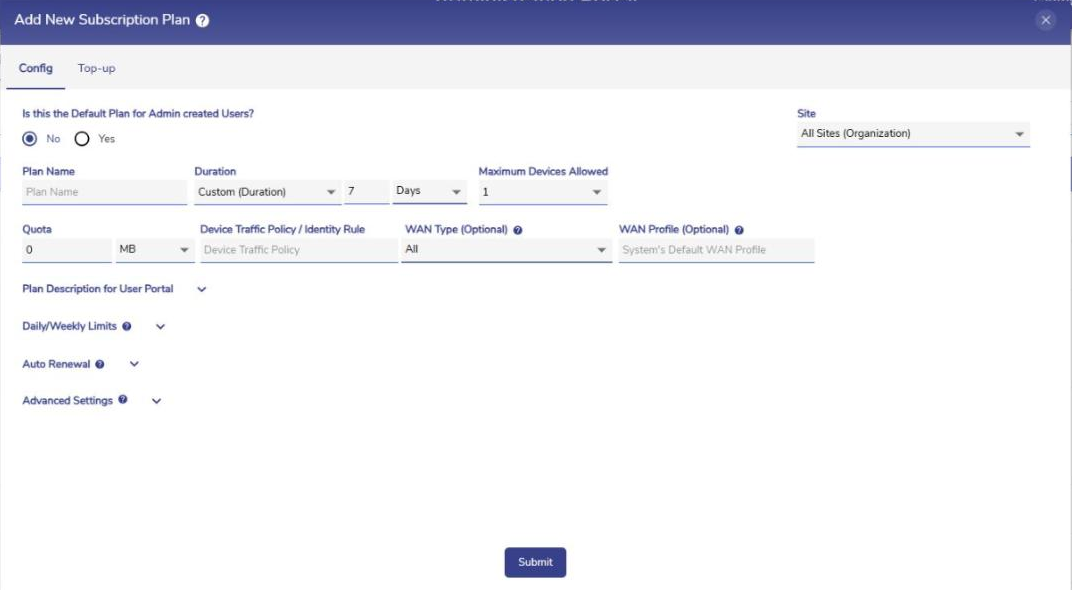
Expand the optional sections as needed:
-
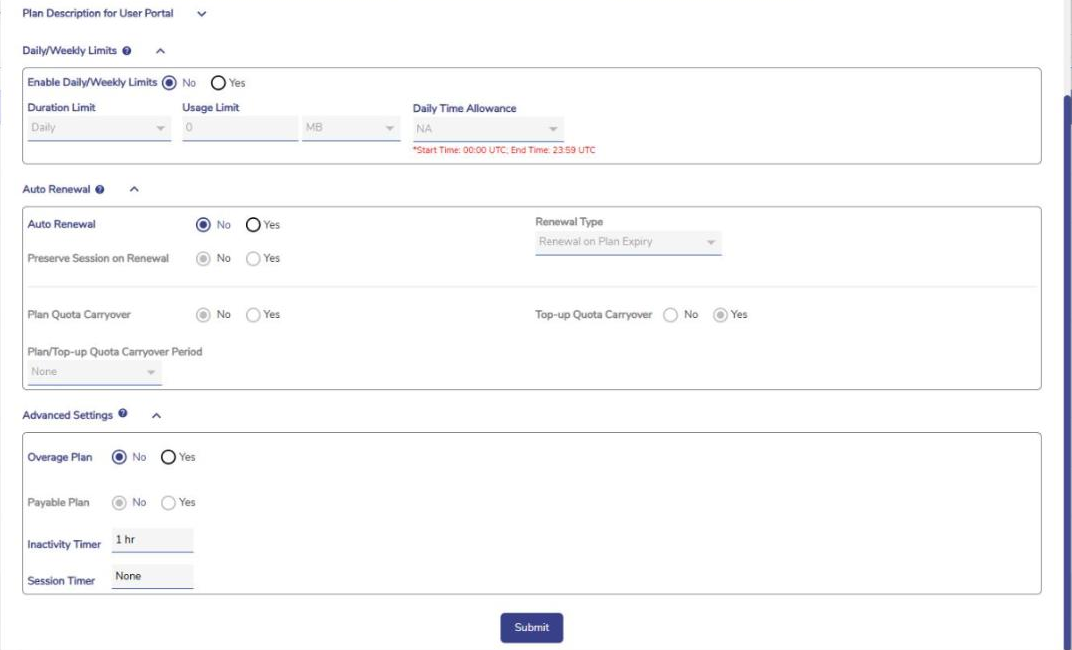
Plan Description for User Portal - up to 3 items of 50 characters, shown to users in the User Portal.
-
Daily/Weekly Limits - Enable Daily/Weekly Limits, then set the Duration Limit (Daily or Weekly), Usage Limit and Daily Time Allowance (start 00:00 UTC, end 23:59 UTC).
-
Auto Renewal - Auto Renewal, Preserve Session on Renewal, Renewal Type, Plan Quota Carryover, Top-up Quota Carryover and the Plan/Top-up Quota Carryover Period.
-
Advanced Settings - Overage Plan, Payable Plan (Paywall-enabled organizations only), Inactivity Timer (session ends after this idle time) and Session Timer.
-
The Top-up tab sets Subscriber Self Top-up, Top-up Limits and the top-ups available with the plan (Add New Top-up).
-
Click Submit to save the plan.
6. Create a User Account for Testing
-
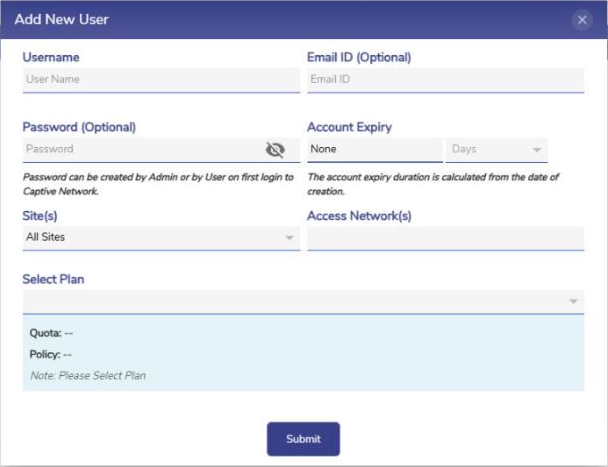
Open the Users tab and click Add User Account. The Add New User dialog opens.
-
Enter the Username (mandatory and unique) and optional Email ID.
-
Password (Optional) - enter a password and share it with the user, or leave it empty so the user creates a password at first login.
-
Account Expiry - None, or a number of days from creation.
-
Site(s) and Access Network(s) - where the user may log in (default All Sites).
-
Select Plan - the plan from step 5. The Quota and Policy of the selected plan are shown below it.
-
Click Submit.
7. Test Login
Connect a device to the captive network and log in to the User Portal with the test credentials. See Guide: CAN User Portal.