
This guide explains how to set up Dynamic Routing on an CommBox EdgeOS device so that it can exchange routes with neighbouring routers using OSPF or BGP. For an overview of the feature, see Routes. For a description of every field on the screen, see Configuration.
Dynamic Routing - Use Cases
Use Dynamic Routing when the CommBox EdgeOS device must exchange routes with other routers at the site or upstream, so that routes are shared and updated automatically instead of being maintained manually as static routes on each router. Typical use cases:
|
Use case |
How Dynamic Routing helps |
Protocol |
|---|---|---|
|
Make the site LANs reachable from a customer or onboard core router |
The CommBox EdgeOS device advertises its LANs, Access Networks and Static Routes to the neighbour router, so no static routes are needed on that router. |
OSPF (same network) or BGP |
|
Reach networks behind another router |
The CommBox EdgeOS device learns the external routes from its neighbour instead of relying on manually entered static routes. |
OSPF or BGP |
|
Make Hub networks reachable from the local network |
The Hub Managed Network option advertises the Hub networks to the neighbour router. |
OSPF or BGP |
|
Peer with an upstream or third-party router in a different autonomous system |
BGP exchanges routes between the Local AS and the Remote AS of the peer, and the allow/block option controls which prefixes are announced. |
BGP |
|
Sites where networks are added or changed |
Routing tables are updated automatically when the network changes, instead of editing static routes on each router. |
OSPF or BGP |
|
Sites with several routers and networks |
Multiple services, neighbours and advertised networks can be configured on one device. |
OSPF and/or BGP |
|
Fast detection of a failed neighbour |
BFD can be enabled per neighbour for fast failure detection. |
OSPF or BGP |
|
Rolling out the same routing setup to many devices |
The configuration can be prepared in the CSV template and uploaded, and the active configuration can be exported. |
OSPF and/or BGP |
When not to use it: if the site has a small, fixed network with a single gateway, use Static Routes instead.
Dynamic Routing - Capabilities and Limitations
|
Supported |
Not Supported / Limitations |
|---|---|
|
|
Before you begin
-
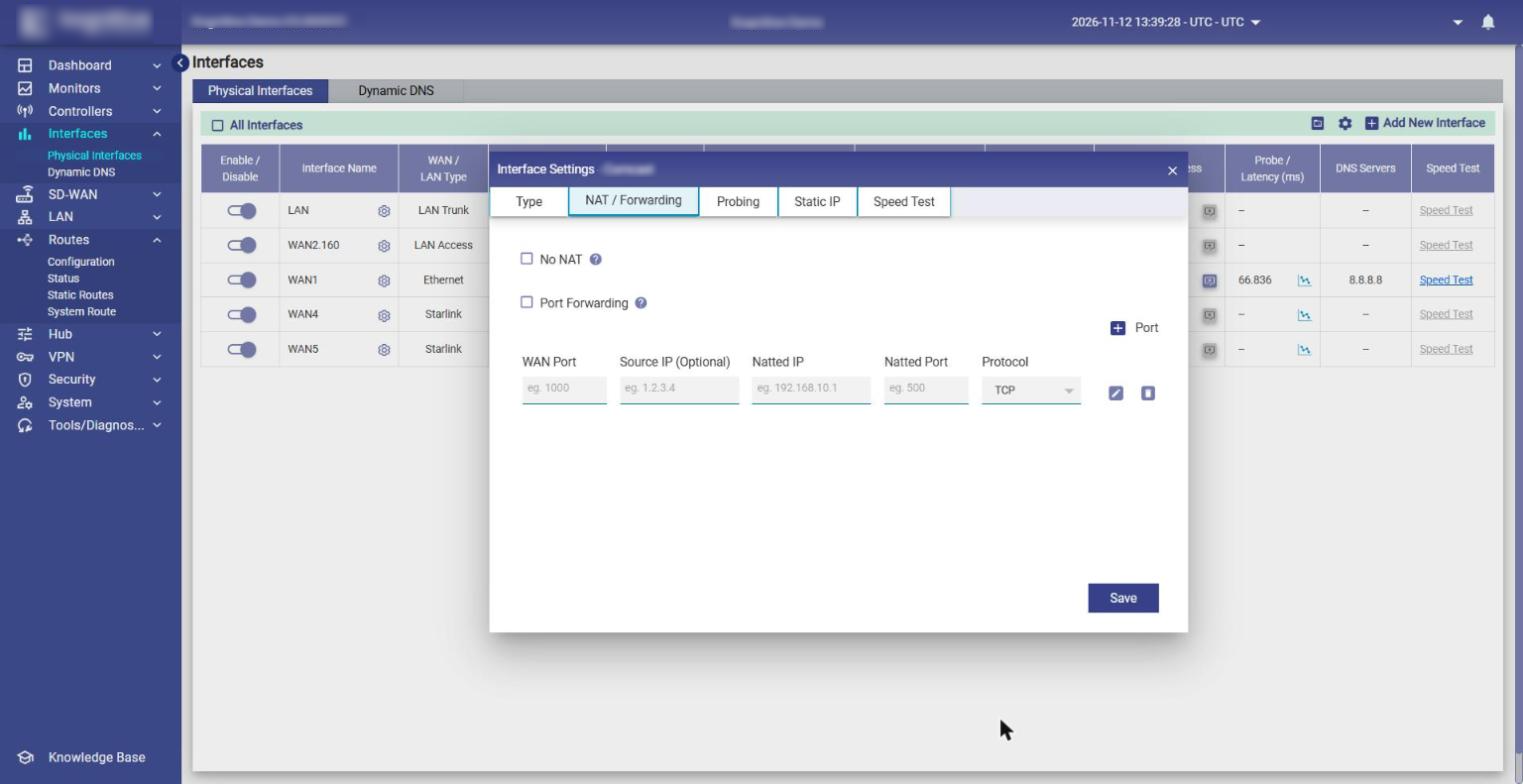
Disable NAT on the participating WAN interfaces. Dynamic Routing does not work on interfaces with NAT enabled. Select Interfaces > Physical Interfaces, click the Gear icon next to the interface, open the NAT/Forwarding tab, select the No NAT checkbox and click Save. The interface must be disabled before its configuration can be edited. For details, see Interface Settings.
-
Collect the values from the network design: the Router-ID, the OSPF Area Number and/or the Local AS and Remote AS numbers for BGP, the WAN interface(s) and IP addresses that face the neighbour router, the neighbour IP addresses, and the networks to advertise.
-
Only OSPF and BGP are supported. Dynamic Routing is disabled by default.
Step 1: Enable the routing protocol
-
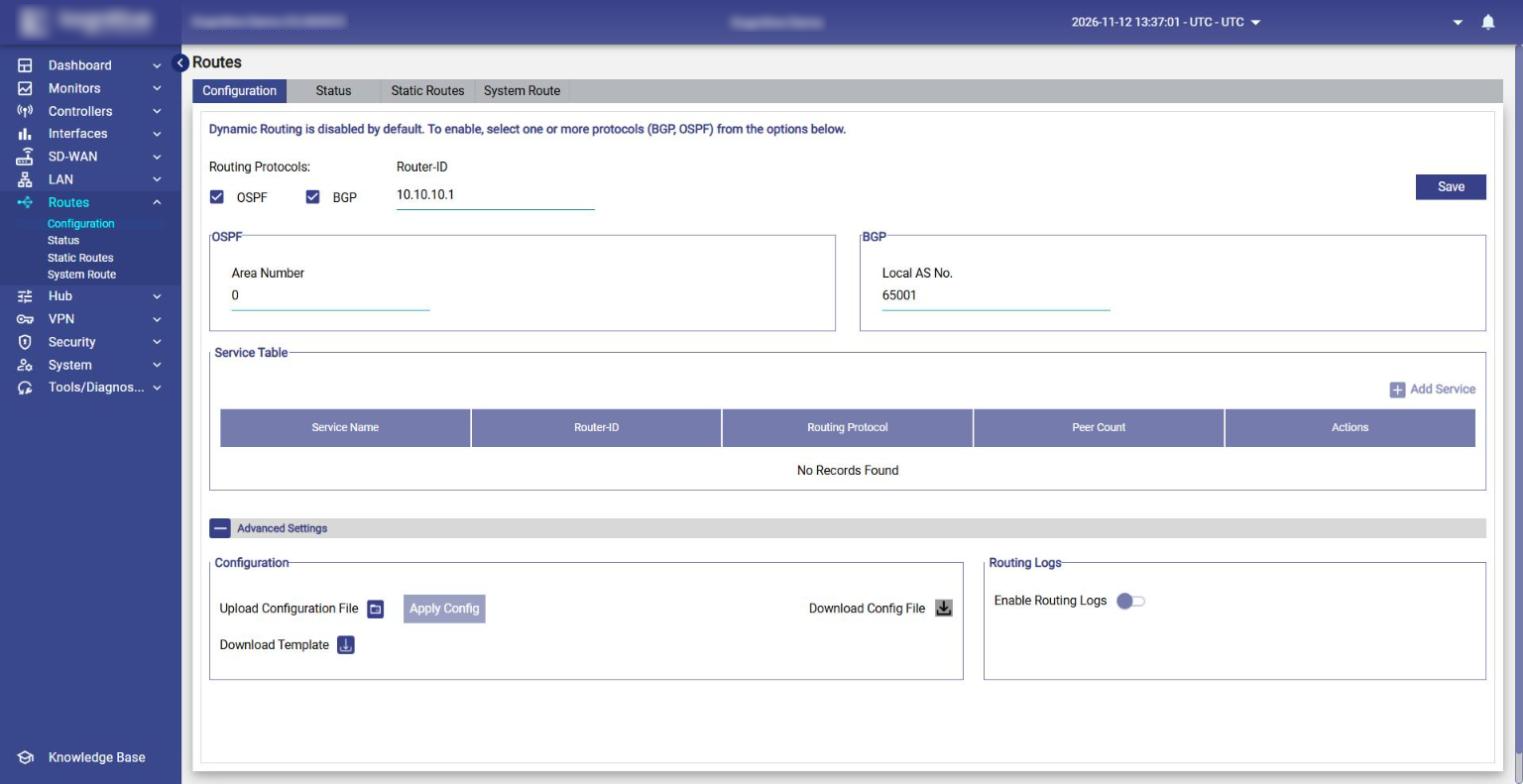
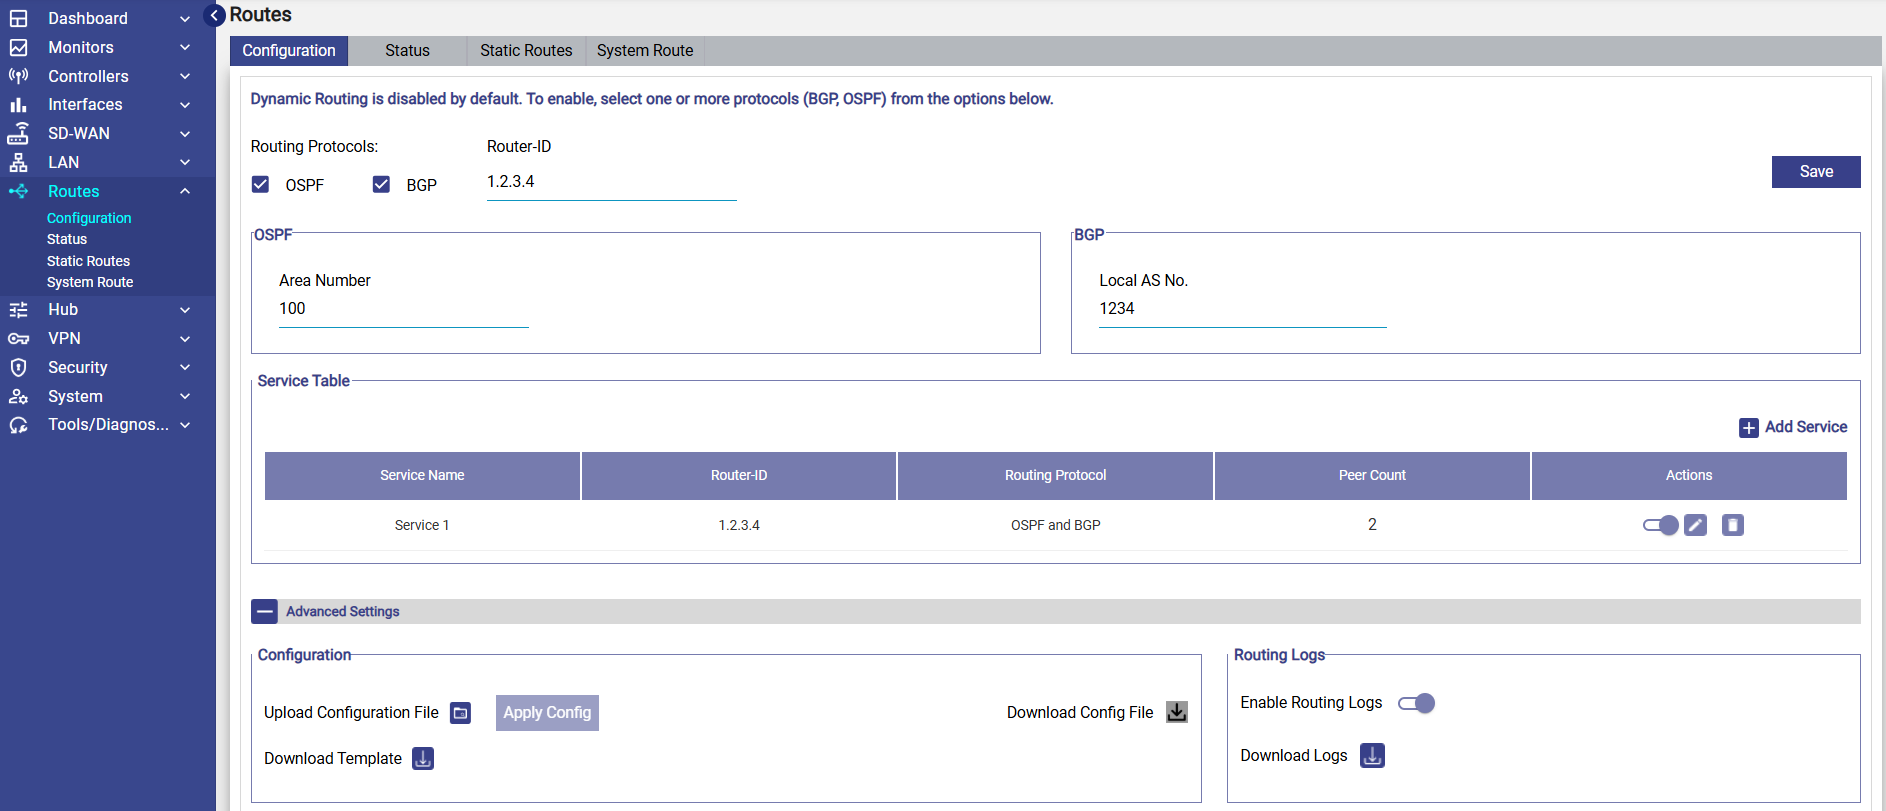
Select Routes from the side menu bar. The Configuration tab opens by default.
-
Under Routing Protocols, select OSPF, BGP or both.
-
Enter the Router-ID in IPv4 format (for example, 10.10.10.1). It must be unique within the routing domain and is used by both protocols.
-
For OSPF, enter the Area Number (for example, 0 for the backbone area). For BGP, enter the Local AS No. (for example, 65001).
-
Click Save at the top right. The Add Service button is enabled only after these settings are saved.
Step 2: Add a Dynamic Routing service
-
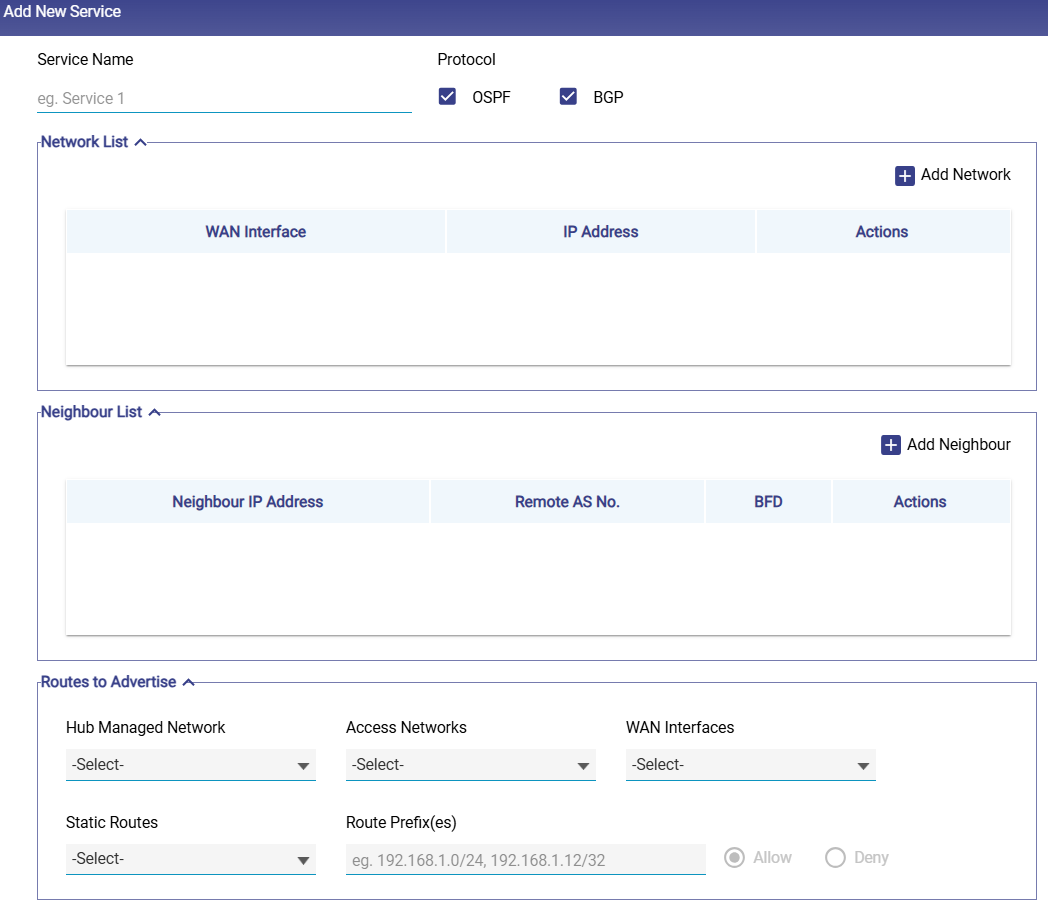
Click Add Service. The Add New Service window opens.
-
Enter the Service Name and select the protocol(s) the service uses: OSPF, BGP or both.
-
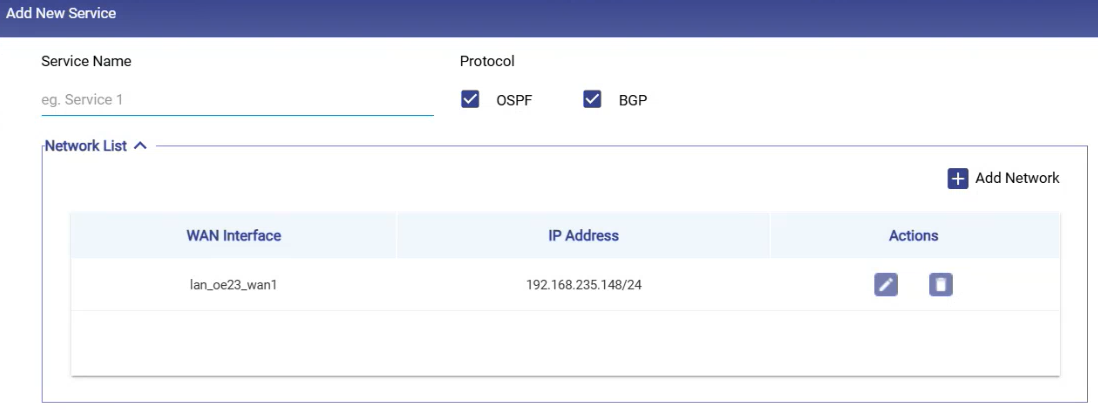
Network List: click Add Network, select the WAN Interface, enter its IP address with subnet and click the save icon. These interfaces are used to communicate with the OSPF neighbours or BGP peers.
-
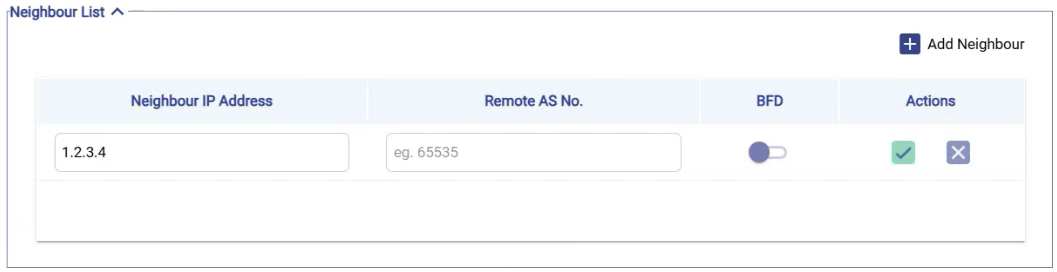
Neighbour List: click Add Neighbour, enter the Neighbour IP Address and, for BGP, the Remote AS Number. Optionally enable BFD for fast failure detection. Click the save icon.
-
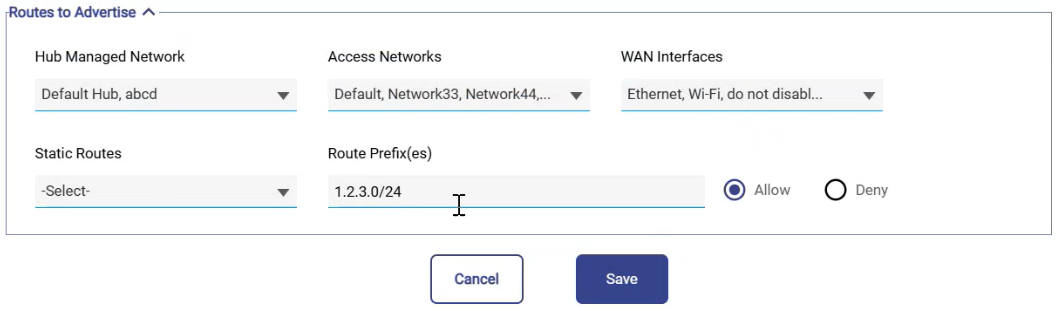
Routes to Advertise: select the networks to announce to the neighbours in Hub Managed Network, Access Networks, WAN Interfaces, Static Routes and/or Route Prefix(es) (for example, 192.168.10.0/24). Choose whether to allow or block advertisement of the selected prefixes.
-
Click Save. The service appears in the Service Table. Make sure it is enabled with the toggle in the Actions column.
Example: OSPF
An CommBox EdgeOS device joins OSPF area 0 with one neighbour router and advertises its site LAN. The values are examples only; use the values from your network design.
|
Setting |
Example value |
|---|---|
|
Routing Protocols |
OSPF |
|
Router-ID |
10.10.10.1 |
|
Area Number |
0 |
|
Service Name |
OSPF-Site-A |
|
Network List |
WAN interface facing the neighbour, 192.168.50.2/24 |
|
Neighbour List |
192.168.50.1 |
|
Routes to Advertise |
Access Networks: the site LAN (for example, 192.168.10.0/24) |
The neighbour router must be configured in the same OSPF area.
Example: BGP
An CommBox EdgeOS device peers with an upstream router in a different autonomous system and advertises its site LAN. The values are examples only.
|
Setting |
Example value |
|---|---|
|
Routing Protocols |
BGP |
|
Router-ID |
10.10.10.1 |
|
Local AS No. |
65001 (private AS numbers are 64512–65534) |
|
Service Name |
BGP-Upstream |
|
Network List |
WAN interface facing the peer, 203.0.113.2/30 |
|
Neighbour List |
Neighbour IP Address 203.0.113.1, Remote AS Number 65000, BFD optional |
|
Routes to Advertise |
Access Networks: the site LAN; Route Prefix(es): 192.168.10.0/24 (allow) |
The peer router must be configured with this device's IP address (203.0.113.2) and AS number (65001).
Step 3: Verify the configuration
-
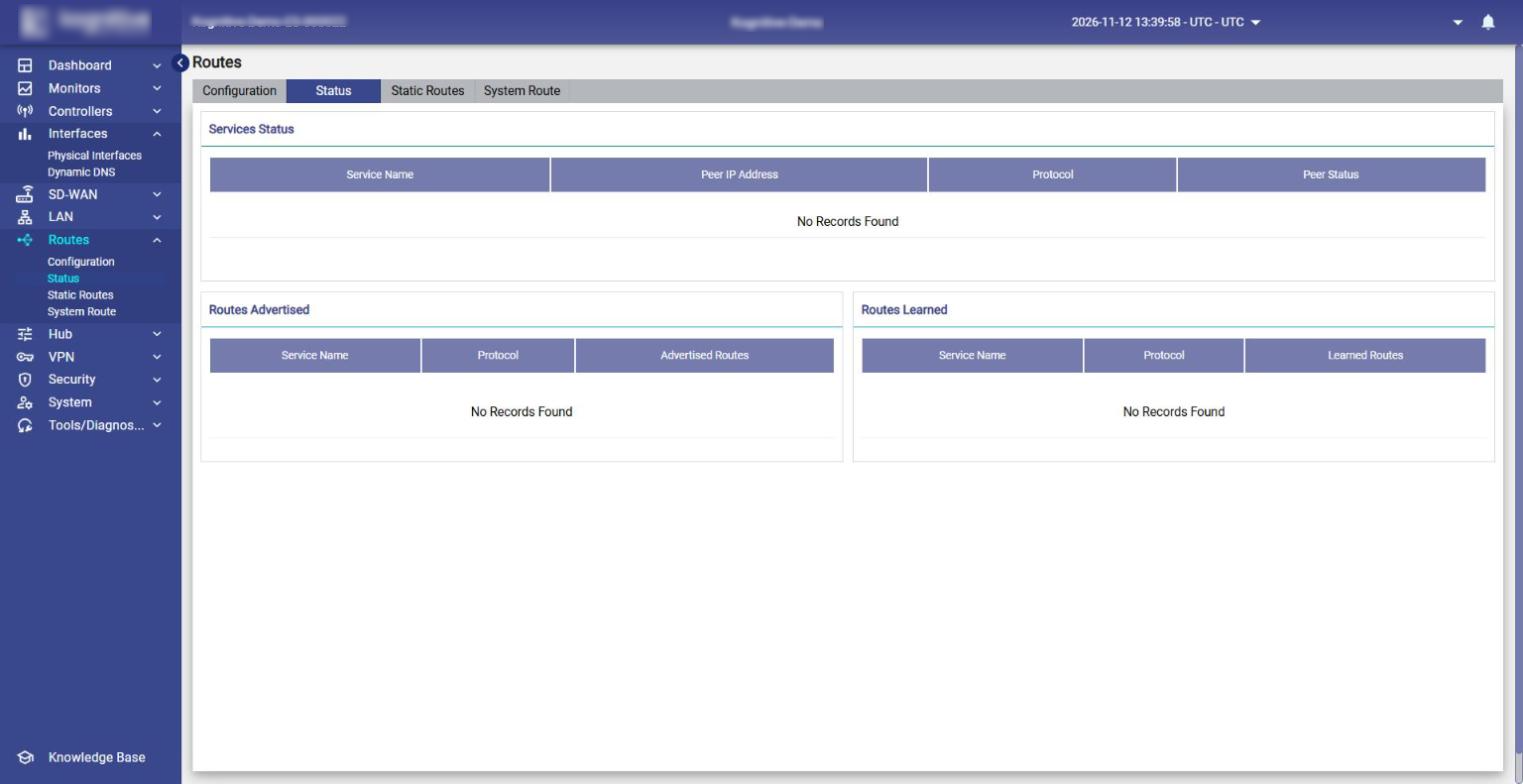
Select Routes from the side menu bar and click the Status tab.
-
Under Services Status, check that the Peer Status of each neighbour is green (Up).
-
Under Routes Advertised, check that the expected networks are shared with the neighbours.
-
Under Routes Learned, check that routes are received from the neighbours.
For details, see Status.
Troubleshooting
|
Problem |
What to check |
|---|---|
|
The Add Service button is greyed out. |
Select at least one routing protocol, enter the Router-ID and the Area Number and/or Local AS No., and click Save. |
|
Peer Status is red (Down). |
|
|
A network is not advertised. |
Check that it is selected in Routes to Advertise, that the prefix is set to allow, and that the service is enabled in the Service Table. |
|
More detail is needed. |
On the Configuration tab, expand Advanced Settings, turn on Enable Routing Logs, then click the Download Logs icon. |
Optional: Configure Dynamic Routing from a CSV file
-
On the Configuration tab, expand Advanced Settings.
-
In the Configuration panel, click the Download Template icon to download the sample CSV file.
-
Enter the dynamic routing configuration in the file and save it.
-
Click the Upload Configuration File icon and select the file. The system validates it.
-
Click Apply Config.
To export the active configuration, click the Download Config File icon.
Related pages
-
Routes – Dynamic Routing overview, prerequisites and limitations
-
Configuration – field reference for the Configuration tab
-
Status – Dynamic Routing status
-
Interface Settings – No NAT setting