
CommBox Edge Core [700-00140]
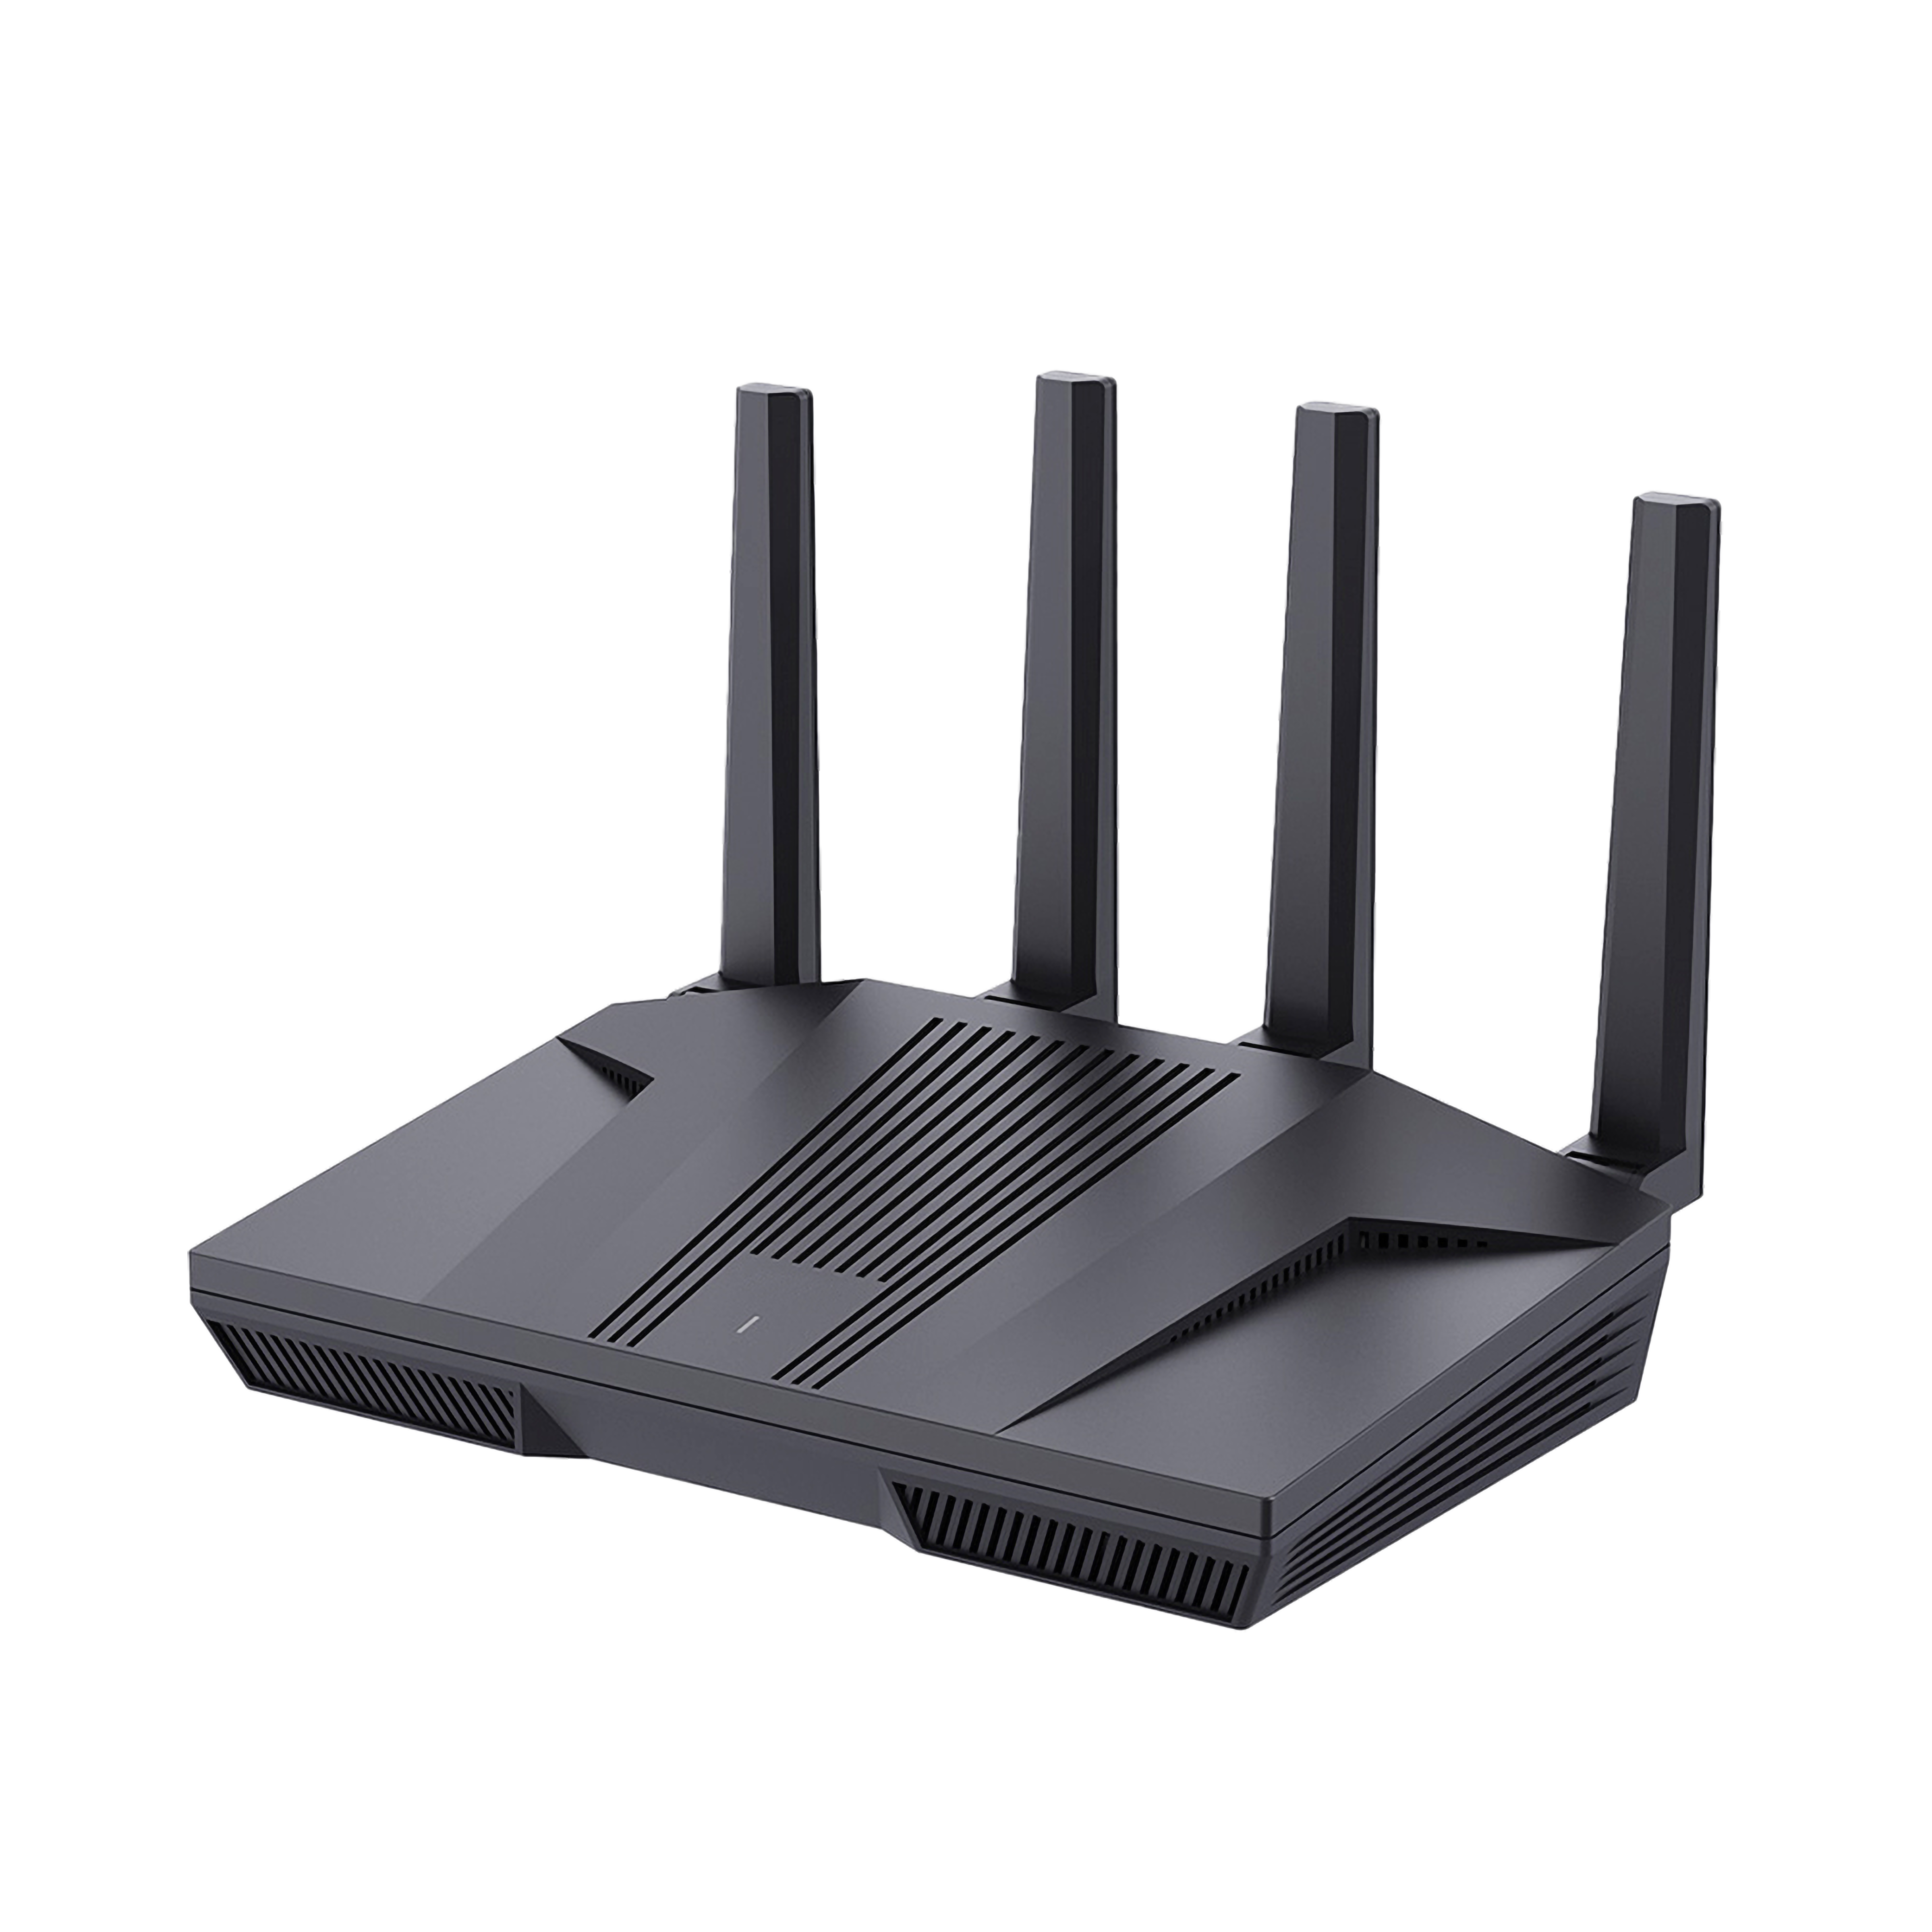
The CommBox Edge Core system is a high-performance Wi-Fi 6 AX6000 router designed to provide robust networking solutions for enterprise environments. This quick start guide will assist you in setting up your CommBox Edge Core system and accessing its web-based administration panel for configuration and management.
The primary components of the CommBox Edge Core system are:
-
CommBox Edge Core appliance
-
12V/4A DC Power Adapter
-
Ethernet Cable

Hardware Overview
-
Side Panel:
-
USB 3.0 port
-
-
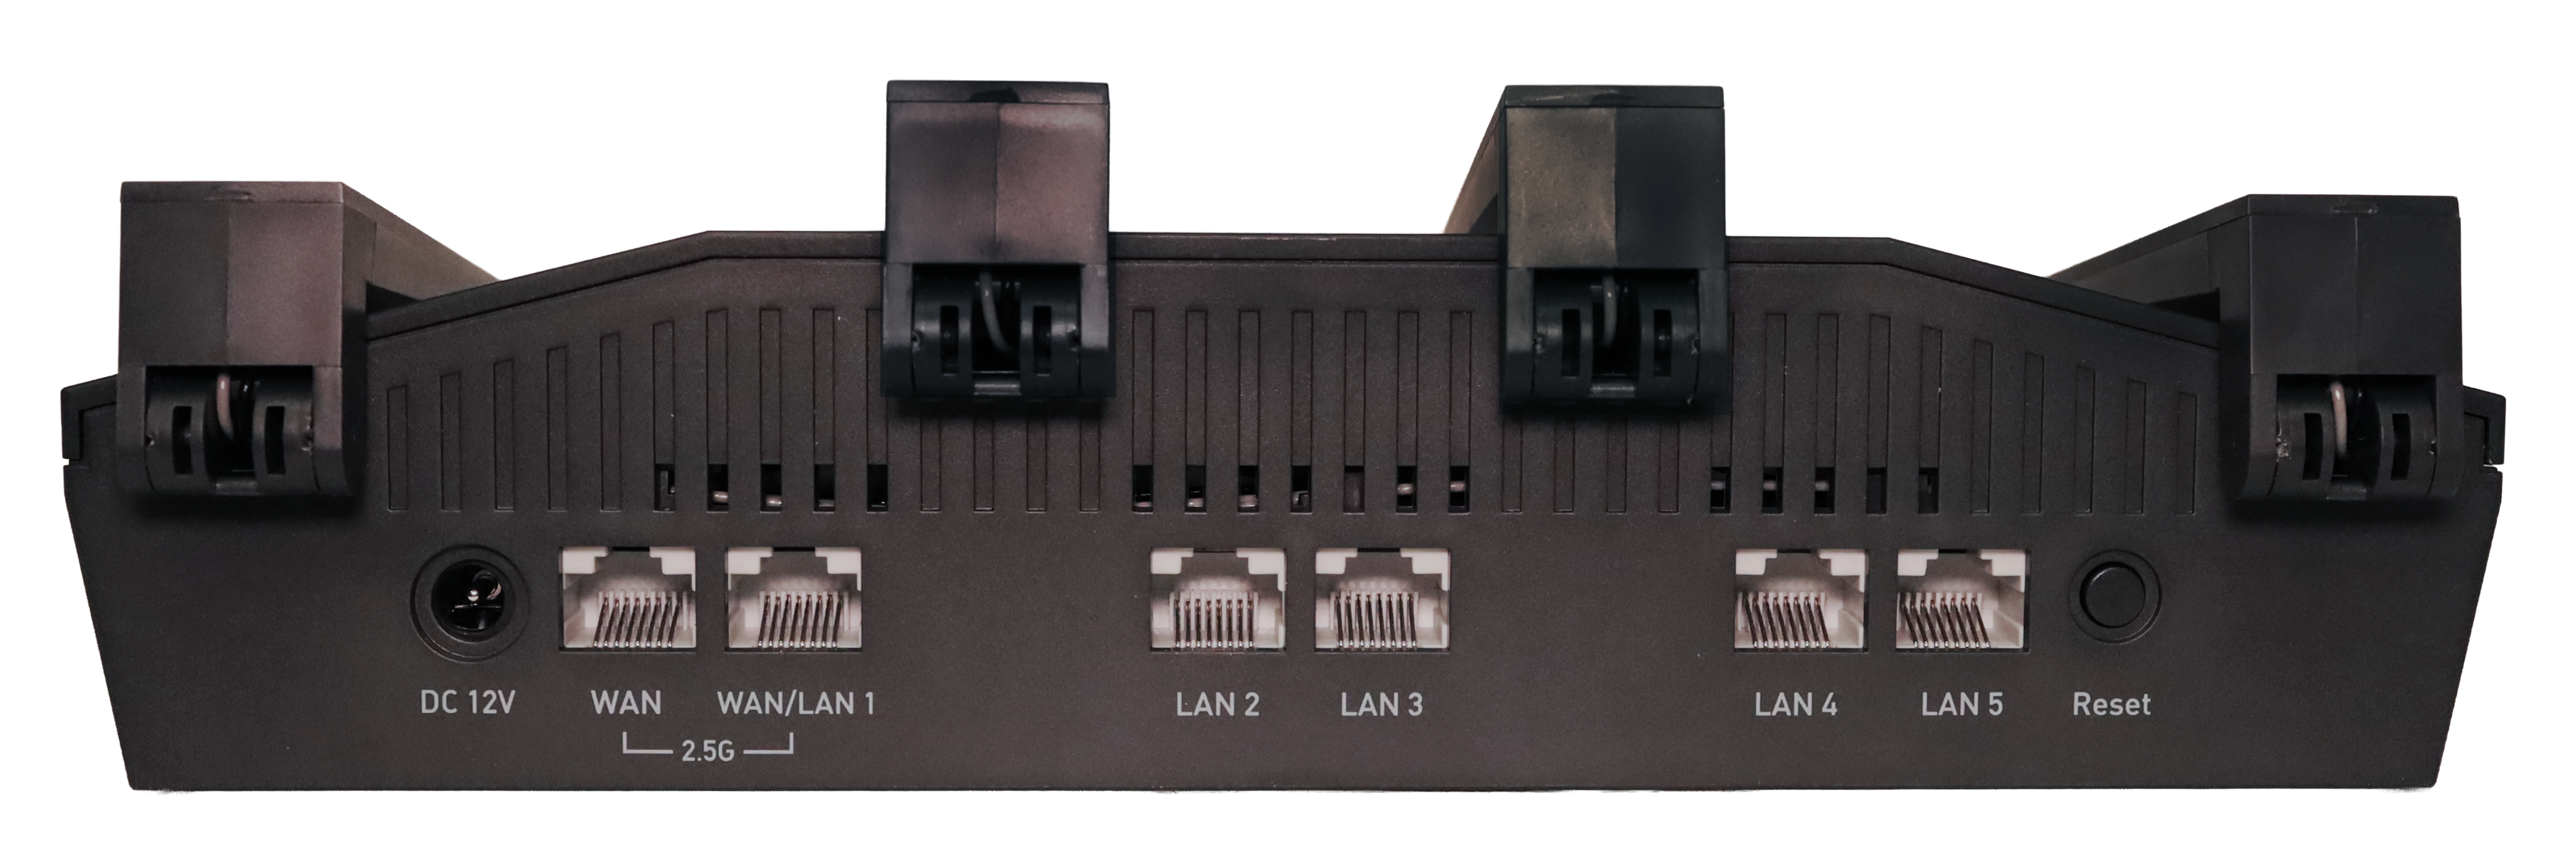
Rear Panel:
-
DC power input (12V/4A)
-
Two 2.5G Ethernet ports (configurable as WAN or LAN)
-
Four 1G Ethernet LAN ports (Configurable as LAN or WAN)
-
Reset button
-
-
Bottom Panel:
-
Device Label with Device ID (DID)
-
-
Front Panel:
-
Device ID (DID) label
-
Steps to bring the system online
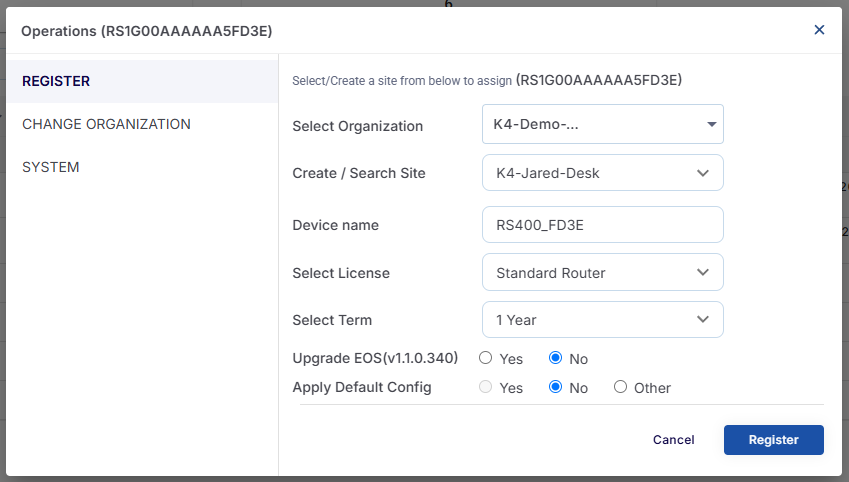
1. Registration
Every CommBox Edge Core, regardless of license type, will need to be registered - which includes assigning the device to an Organization, a Site, creating a unique Device Name, and selecting a License.
All newly procured devices should be listed in the Inventory > Warehouse tab.
-
Open the Warehouse tab for the appropriate Organization and find the device to be registered by matching the Device ID (DID) printed on the device with the row in the table

-
Select the Operations settings icon to Register the device, and fill in the registration values, then hit ‘Register’ and ‘Proceed’ to complete the registration process
-
The newly registered device will now appear in the Inventory > Deployed tab, as well as in the Sites Topology area
After successful registration, the device can be powered on and connected to the internet
2. Device Power & Connectivity
-
Connect the included 12 VDC power adapter to the CommBox Edge Core and plug it into a power outlet. Use a UPS for site deployments with unstable power.
-
Wait for the router to boot up; the LED indicator will flash blue with a sequence of patterns, turn solid white when ready.
-
Connect an ethernet cable from a WAN source into the ‘WAN’ port of the CommBox Edge Core. The WAN source should have DHCP enabled so that it can assign the CommBox Edge Core an IP address.
If a WAN source with internet access is not available, the CommBox Edge Core can still be configured using the “On-Premises” instructions below
3. Configure CommBox Edge Core
After the device is powered on and connected to internet, it can be access either from the cloud or physically, on-premises at the site.
Method 1 - Access from the Cloud / Remote Connection
CommBox Edge Core can be controlled and configured from the cloud. Even if the device is offline, configuration changes can be made and will be pushed to the device when it next comes online.
-
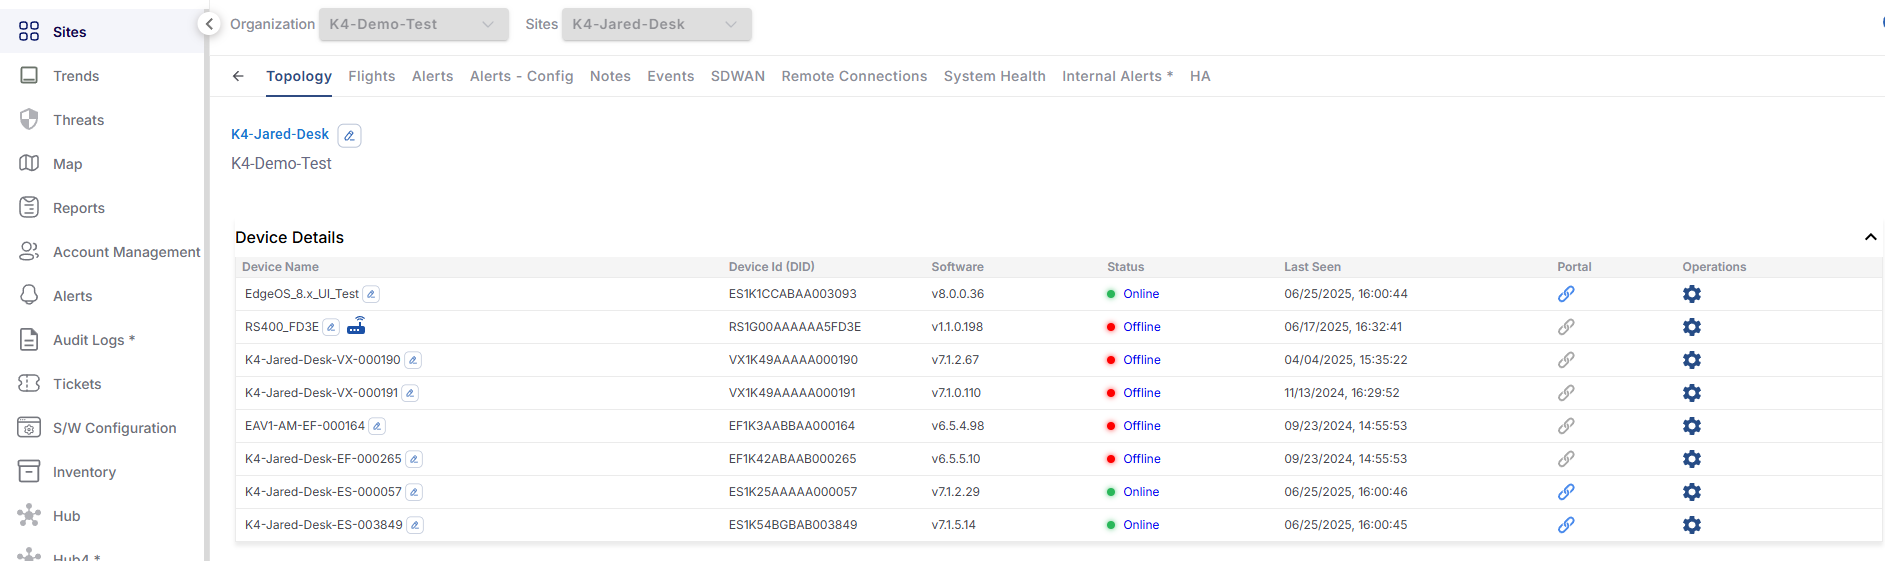
Head to the Sites section, then click on the name of the site where the CommBox Edge Core is registered to open up the site detailed topology view

-
After the Site is selected, the Topology view is shown where the Device Details table lists all of the devices registered to the Site. Here, the online status of each device is shown.
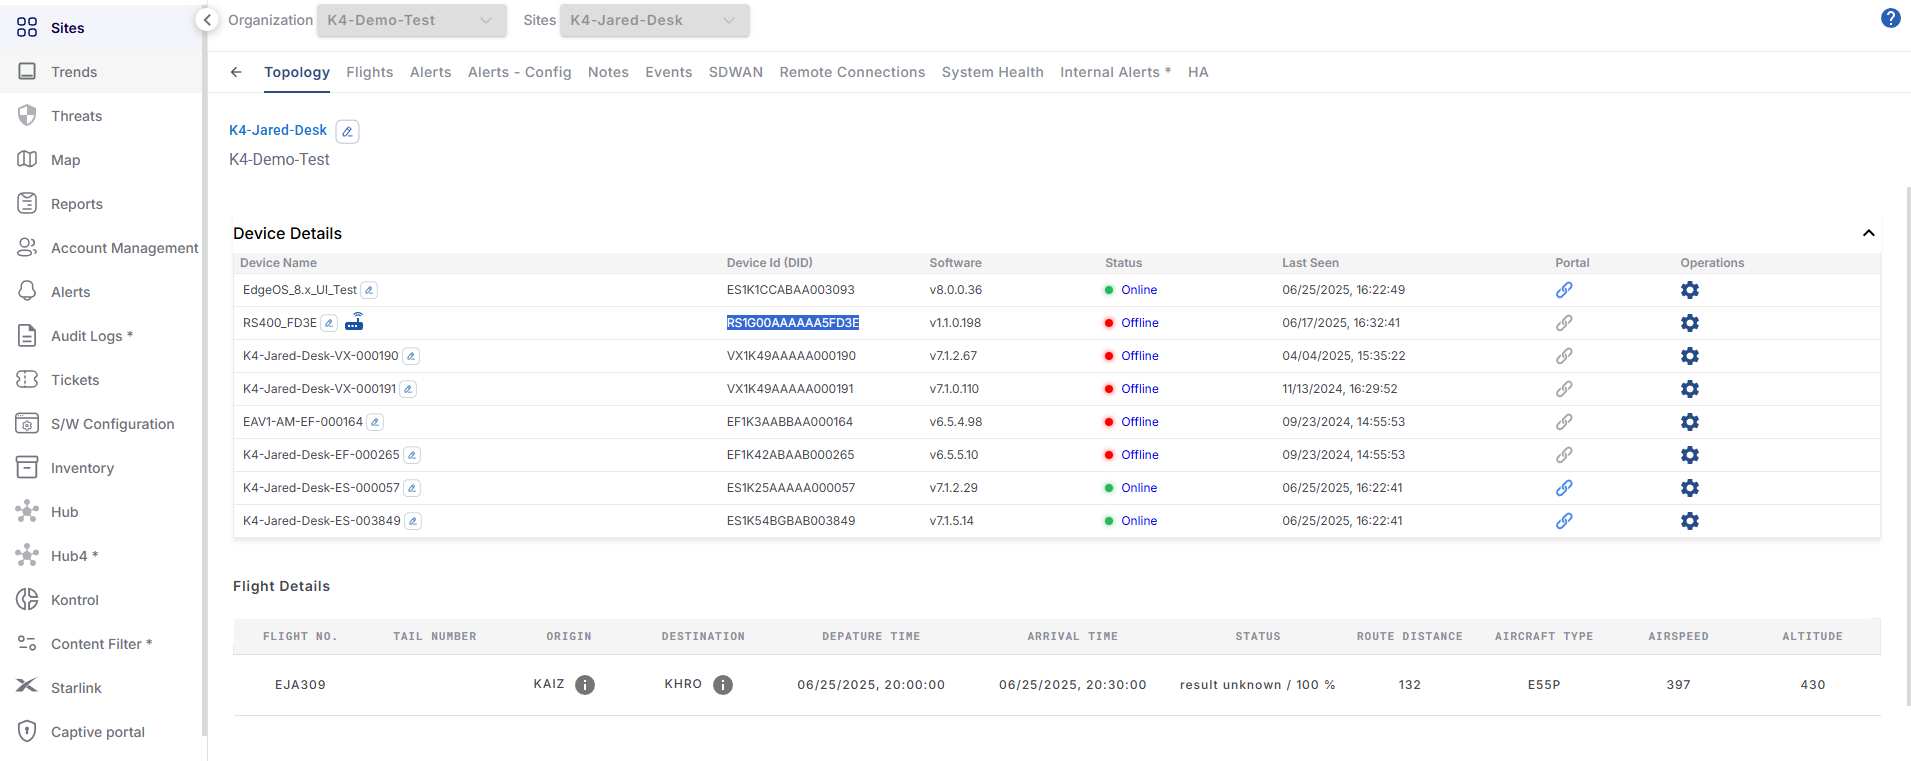
Once online - the Portal link icon will illuminate blue, and the Status should read ‘Online’

-
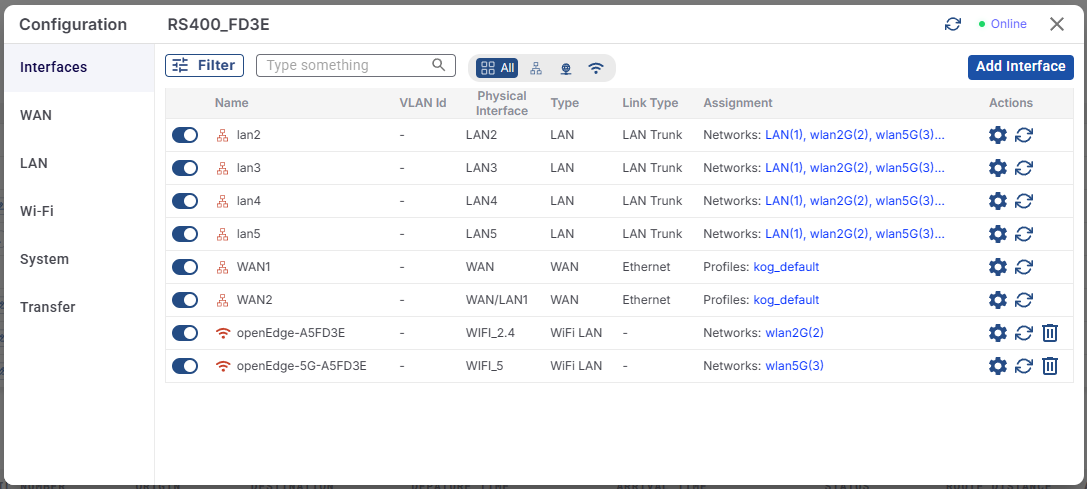
Click on the Settings Icon of the desired device to bring up the Configuration dialog window. The Configuration dialog allows admins to control many of the common device settings from the cloud.
-
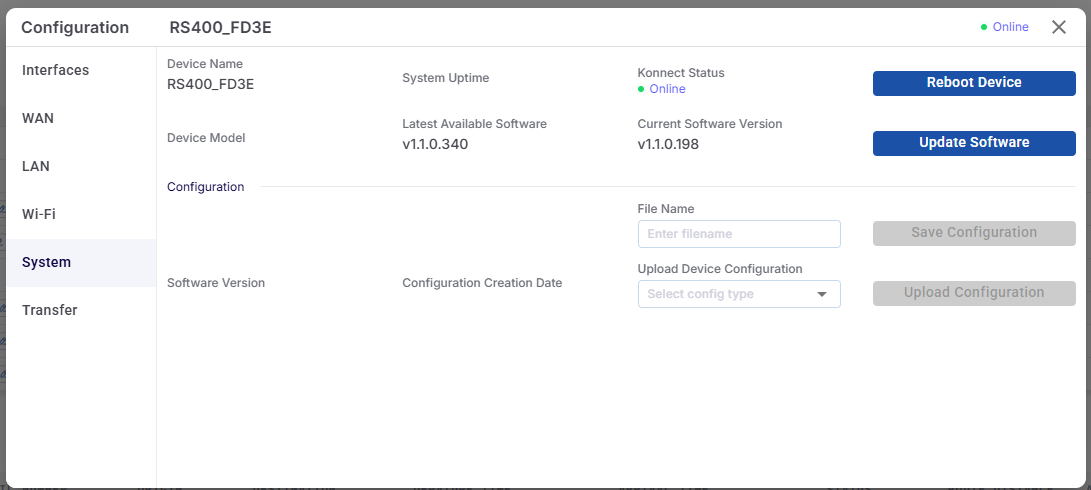
To update the device to the newest Software, head to the System tab and check the Current Software Version. Hit ‘Update Software’ and ‘Proceed’ to confirm and update. The update will take a few minutes, and the device will reboot after the update
Method 2 - Access from the Edge / On-Premises
Physical Connectivity
-
Wired Connection
-
Connect your computer’s ethernet port to one of the LAN ports on the CommBox Edge Core using the provided Ethernet cable.
-
Ensure your computer is set to obtain an IP address automatically (DHCP).
-
-
Wireless Connection
-
On your device, search for an available SSID and connect to the Wi-Fi network
-
For the 2.4 GHz network, the SSID is "CommBox Edge Core-XXXX"
-
For the 5 GHz network, the SSID is “CommBox Edge Core-5G-XXXX"
-
"XXXX" represents the last four characters of the router's MAC address.
-
-
The default Wi-Fi password is printed on the Device Label of the router.
-
Web Admin Panel
Open a web browser (Chrome, Edge, Safari, etc.) and enter the gateway IP address, which differs based on the access mode
|
Access Mode |
Default Gateway IP |
|---|---|
|
Wired LAN ethernet |
192.168.235.1 |
You will be directed to the initial setup page of the web Admin Panel.
4. Basic Configuration
Generally, CommBox CoreOS device configuration should be done through CommBox Edge Cloud Portal. Please see the relevant section in Sites > Topology > CommBox CoreOS Configuration