
CommBox Edge 6
The CommBox Edge 6 is a robust, cloud-managed edge platform offering advanced SD-WAN, Security, QoS, and LAN services. It can manage up to 12 WAN sources and over 30 LAN networks. The device combines and controls multiple WAN sources with advanced routing and bandwidth bonding. It ensures network integrity with deep packet inspection, traffic policies, and VPN features. The CommBox Edge 6 is compact, fanless, and can be rack or VESA mounted. It's built on an Intel i3 Dual Core processor and supports up to 500 clients and 30 VLAN networks.
The Primary components of CommBox Edge 6 are:
-
CommBox Edge 6 appliance
-
1x DC Power Supply
-
VESA Mounting kit.
Steps to bring the system online
1. Device Power & Connectivity
-
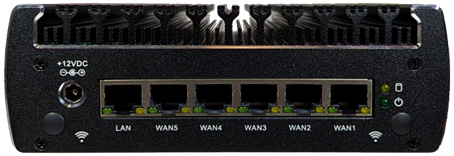
Connect the included power adapter to the CommBox Edge 6 device and plug it into a power outlet. Use a UPS for site deployments with unstable power.
-
Connect an ethernet cable from a WAN source into the ‘WAN1’ port of the CommBox Edge 6 device. The WAN source should have DHCP enabled so that it can assign the CommBox Edge 6 device an IP address.
-
System will power up and be online in a few minutes.
If a WAN source with internet access is not available, the CommBox Edge 6 can still be configured using the “On-Premises” instructions below.
The configuration can also be built in the cloud and will sync with the CommBox Edge 6 upon its connectivity to the internet.
2. Registration
Every CommBox Edge 6 device, regardless of license type, will need to be registered - which includes assigning the device to an Organization, a Site, creating a unique Device Name, and selecting a License.
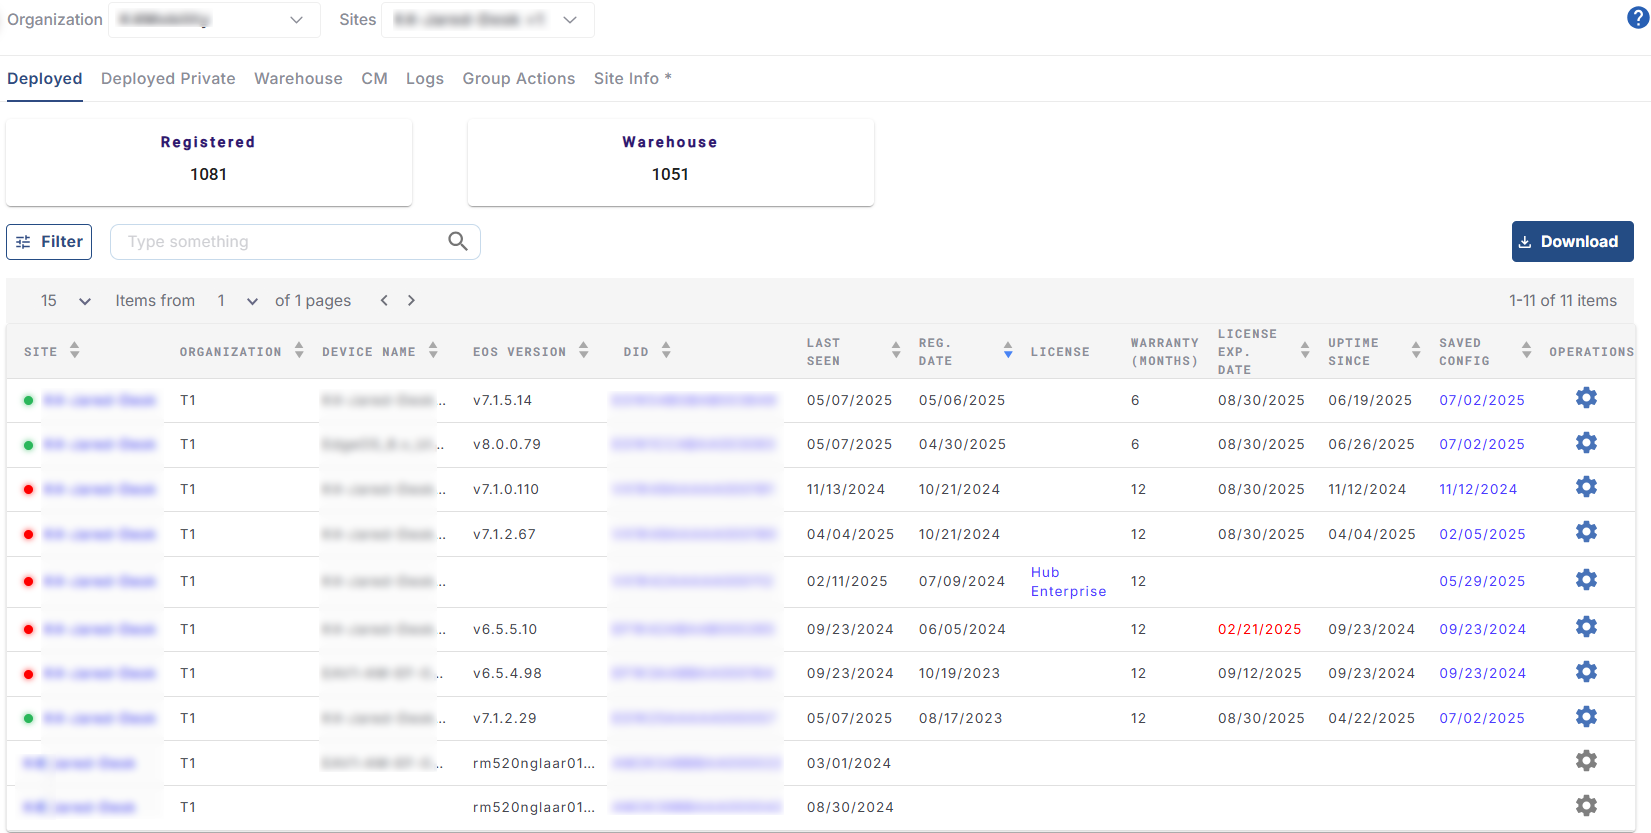
All newly procured devices should be listed in the Inventory > Warehouse tab of the CommBox Edge Cloud Portal Portal.
-
Log in to CommBox Edge Cloud Portal Portal with valid credentials.
-
Select Inventory option from the left menu bar.
-
Select the Warehouse tab.
-
Open the Warehouse tab for the appropriate Organization and find the device to be registered by matching the Device ID (DID) printed on the device with the row in the table.
-20250904-134037.png?cb=238156667f24a93f9bf52a3bc9676bf6)
-
Select the

-20250904-134249.png?cb=3652d71281effb4cd3d3e0a29dccd725)
-
In the Select Organization field, select the required organization from the dropdown menu.
-
Next the user has to select the site. A Site is a Vessel, Store, Car, Truck, etc. where the Edge System will remain present and can reliably be identified by the management. Multiple Edge nodes can be in a single Site. The options here are to use an existing Site or add a new Site.
-
In the Create/Search Site field, type the name of the required site.
-
Select the site from the list of existing sites in the system.
-
To add a new Site, enter the name of the site and click Add.
-
This will create a new site and assign the device to that site.
-
Enter a Device Name.
-
In the Select License field, select a License type from the dropdown menu .
-
Select the Term from the dropdown menu.
-
In the Upgrade EOS field, select the Yes radio button to update the EOS Version of the device. Click No to continue with the existing EOS Version.
-
In the Apply Default Config field, select the Yes radio button to apply the default configuration for that site.
-
Select the No radio button to let the device continue in its current configuration.
-
Select the Other radio button to select any configuration from the list of available Backup Configurations taken and stored by the user.
-
In the Select Configuration field, select the required configuration from the dropdown menu.
-
Click Register button to assign the device to the selected site and complete the registration process.
-
Once assigned, the device gets moved from the Warehouse tab and is displayed under the Inventory > Deployed tab.
-
The newly registered device will also appear in the Sites > Topology screen.
-20250904-134444.png?cb=cbc6c0b2a42048ab4285d7decd1d3046)
-
After successful registration, the device can be powered on and connected to the internet.
3. Configure CommBox Edge 6
After the device is powered on and connected to internet, it can be access either from the cloud or physically, on-premises at the site.
-
(Option 1) Connect Laptop Ethernet interface to CommBox Edge 6 LAN Ethernet Port [Left-most port], configure laptop interface to “obtain IP address automatically” (DHCP).
-
Laptop IP address should be assigned from the 192.168.230.0/24 network space.
-
-
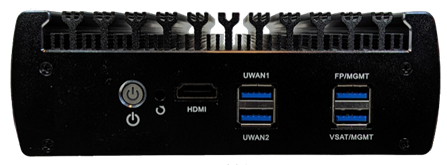
(Option 2) Connect Laptop via USB Ethernet Dongle to CommBox Edge 6 USB FP/MGMT Port [Top-Right USB port], configure laptop interface to “obtain IP address automatically” (DHCP).
-
Laptop IP address should be assigned within the 10.255.240.0/28 network space.
-
-
Open Web Browser on Laptop; enter in the URL: http://10.0.254.1 (or the GW IP address) and return.
-
CommBox EdgeOS Web Portal login appears. Use the provided username/password, or with a new system use the temporary login credentials: edge/edge.
-
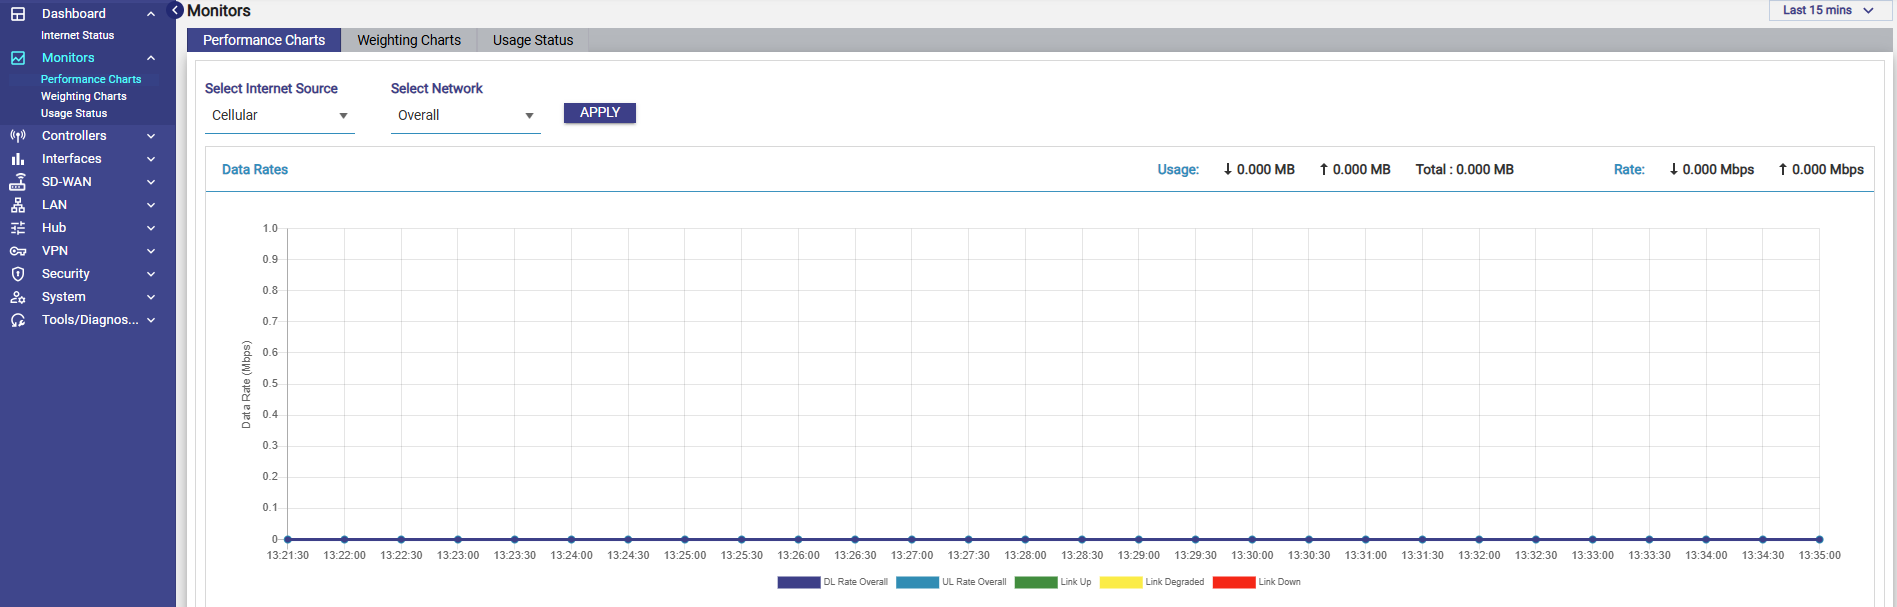
Portal Dashboard will appear as shown in the screenshot below.
-20250904-134829.png?cb=e7458ee99dab180e28d5fa851c70670d)
-
Internet link status - “Internet (WAN) Status” is shown in the Dashboard.
-
Internet Performance - “Performance Charts” can be accessed under the Monitors section in the left menu bar.
-
Device Usage – “Usage Status” can be accessed under the Monitors section in the left menu bar.
-
The configuration can be updated by using the various tabs such as Controllers, Interfaces, SD-WAN, LAN, Firewall and System.
4. Troubleshooting
-
DC Power to CommBox Edge 6 must be stable, UPS required for on site operation. Blinking on/off power will move the device to a safe power mode (off), which requires a 5 second disconnect of power and reconnection.
-
User Manuals are available at: https://kvh.scrollhelp.site/kb/
-
For detailed steps of the registration process, reference the Product Registration Guide: How To: Register A Device