
CommBox Edge VM - Proxmox Installation Guide
Download and Decompress the Image
SSH to your Proxmox server and change to the images directory
cd /var/lib/vz/imagesDownload the latest QCOW image from SPORT and decompress the file.
gzip -dk vx-blank-v7.1.4.49~45885ba.qcow2.gzCreate a new VM (Without Disk)
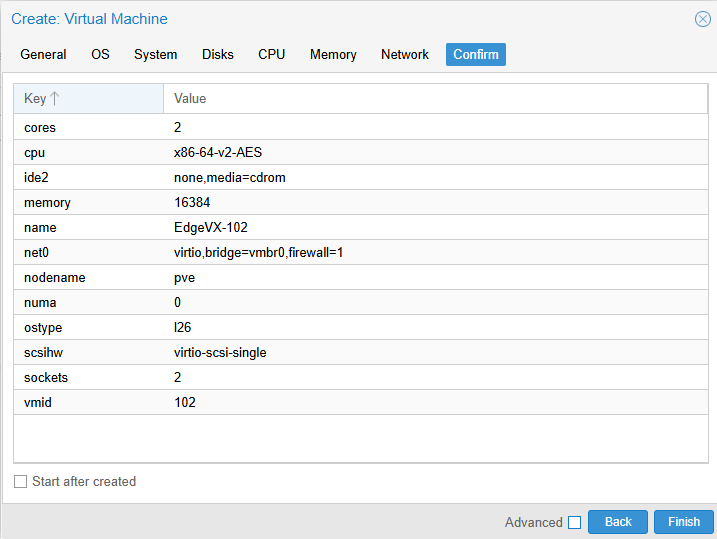
In the Proxmox Web UI:
Go to
Datacenter > Node > Create VMEnter:
VM ID: (e.g.,
101)Name: (e.g.,
CommBox Edge VM)
On the OS tab:
Choose “Do not use any media”
On the System tab:
Leave defaults.
On the Hard Disk tab:
Delete the existing Hard Drive.
Complete the rest (CPU, Memory, Network)
CPU - 4 vCPUs for production installation. 2 vCPUs for lab or testing.
Memory - 16GB
Network Device - 3 NICs (WAN, LAN, Management)
Click Finish
You will not be able to add more than one Network Device when the VM is first created. Make sure to add the additional Network Devices before you boot the VM.
This creates a VM shell without a disk, which we’ll now attach.
Import and attach the Disk
On the Proxmox shell use the
qm importdiskto import the disk. Remember to replace “102” with the VM ID you were given when you created the VM.
qm importdisk 102 vx-blank-v7.1.4.49~45885ba.qcow2 local-lvmAttach the disk to the VM by navigating to
VM > Hardware > Unused Disk 0and clicking Add.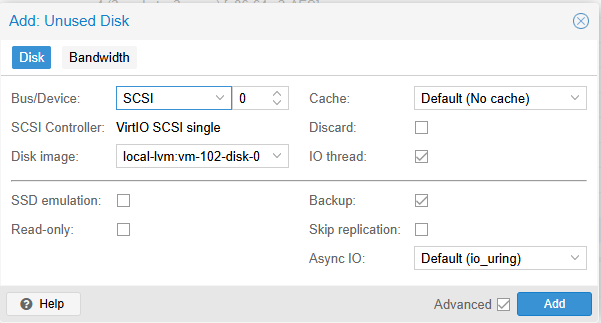
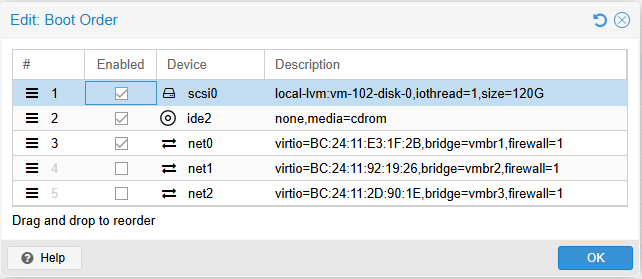
Update the Boot Order by Navigating to
VM > Options > Boot Order. Make sure the SCSI0 is at the top of the list and enabled.
Start the VM.
Follow the VM Personalization guide to complete the installation.